How to Add a New Printer Profile on Techdinamics Print Client [Step-by-Step Guide]
Last updated: October 29, 2026
The Techdinamics Print Client allows you to connect your local printer to your Techdinamics application, enabling you to print shipping labels and other related documents directly from your workspace.
This guide covers the requirements and steps to add a new printer profile, configure its connection to techSHIP or techOMS, and verify that printing works correctly.
Meeting the Requirements
To use the Application selector and the corresponding connection settings described in this guide, you must be running Techdinamics Print Client v1.0.0.60 or later. For upgrade instructions, refer to 📄 How to Upgrade your Techdinamics Print Client [Step-by-Step Guide].
Before you begin, make sure you meet the following requirements:
Your thermal printer must be ZPL compliant.
You must have your API credentials ready. Depending on your platform, this consists of an API Secret and either a Connection Name (for techOMS) or an API Description (for techSHIP).
To generate these credentials, refer to the specific guide for your application:
Each printer must have a unique name.
A printer setup can include:
One thermal printer (usually 4x6, for shipping labels).
One optional generic printer (inkjet or laser for documents like packing slips or commercial invoices).
Adding a New Printer
Once you have your credentials, you can configure the desktop client to communicate with your online application.
Open the Techdinamics Print Client.
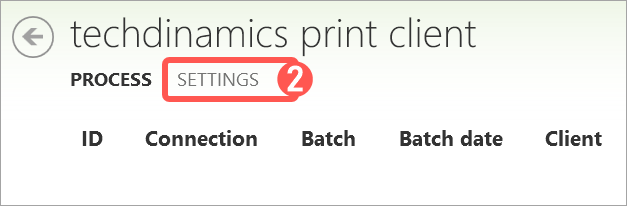
Access the Settings tab.
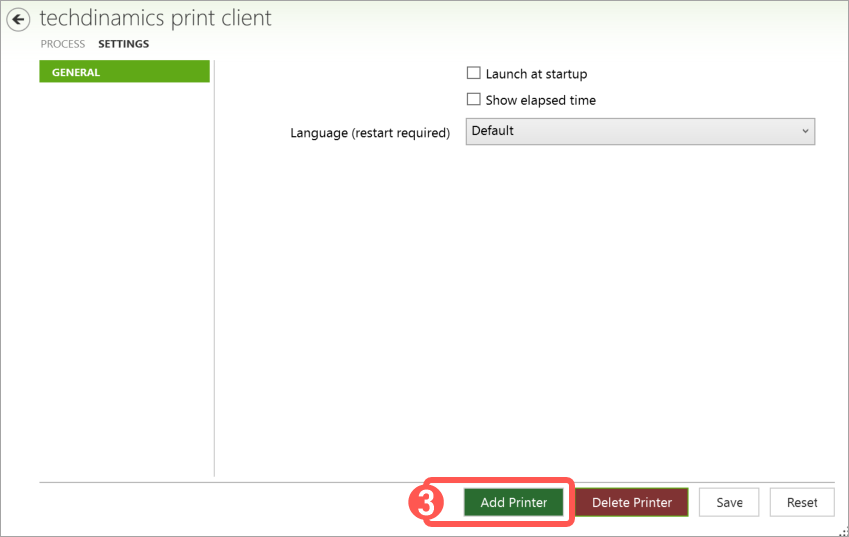
Click the Add Printer button.
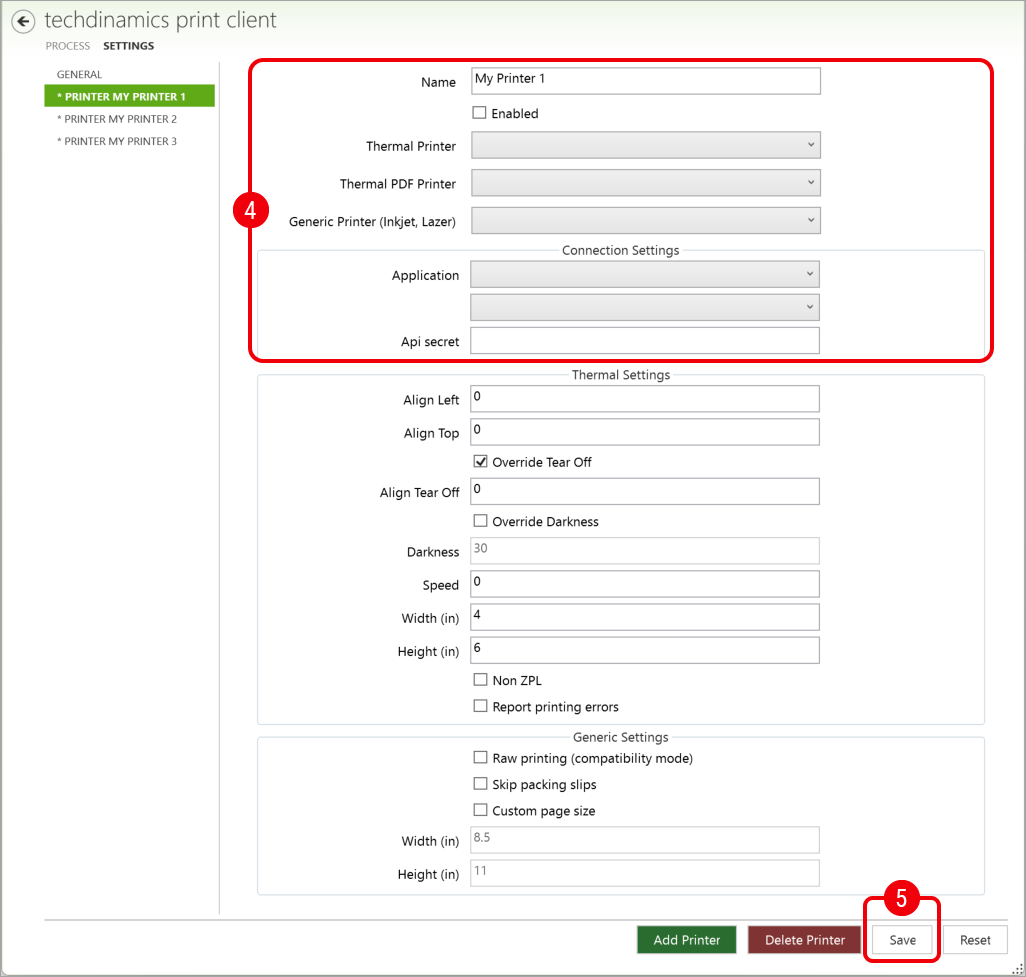
Set up the connection settings:
Name: Enter a name for your printer profile.
The Name field must exactly match your Connection Name (if using techOMS) or your API Description (if using techSHIP). Differences in capitalization or spacing can cause the server to reject the connection and prevent your documents from printing.
If your connection is rejected, verify the selected Application, the corresponding Region or techOMS environment, the Api secret, and the Name before trying again.
Enabled: Check this box to enable the printer immediately. You can leave it unchecked if you plan to enable it later.
Select your physical hardware from the Thermal Printer or Generic Printer (Inkjet, Lazer) dropdown menus, depending on the documents you intend to print.
Additional optional settings may appear below depending on the thermal printer selected. Ensure your physical printer is plugged in or networked correctly.
Application: Select the application you want to connect to: techSHIP or techOMS. New printer profiles default to techSHIP. This selection applies to the current printer profile, so you can configure different profiles for different applications.
Region (techSHIP only): When you select techSHIP, the Region dropdown appears. Choose the region associated with your techSHIP connection. Available options are Canada (CA), United States (US), Europe (EU), QA (testing), Model Office (testing), and Dev (development).

techOMS environment (techOMS only): When you select techOMS, the Region field is replaced with techOMS environment. Select the environment associated with your techOMS credentials, which is usually Production.

Api secret: Paste the secure API Secret you copied from your respective application.
Click the Save button to create the profile.
If Save reports a missing techOMS environment, select a supported environment for every affected techOMS profile and try again. This validation also applies to profiles where Enabled is unchecked.
Saving your printer profile confirms that its local configuration passed validation. It does not confirm that your credentials were accepted by the server or that your printer can print successfully.
Your printer profile is now saved in the desktop application. Next, verify the printer in your online application.
Verifying the Printer
After saving your printer profile, verify that it can communicate with the selected application and print documents successfully.
Access your online application or refresh the page in your browser. Open the Print Client dropdown in the global header and select the registered connection that matches your configured Name.
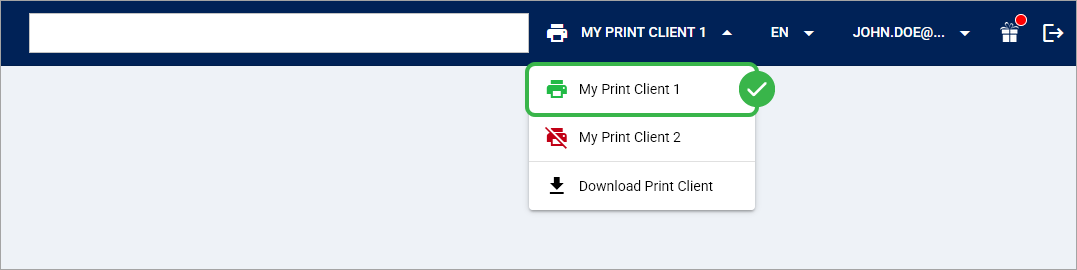
The techOMS Print Client dropdown displays registered connections. A connection appearing in this list, or being selected, does not by itself confirm that your desktop Print Client is connected or that your printer is operational.
For techSHIP, return to your normal techSHIP printing workflow.
To confirm that your printer is working:
Make sure Enabled is selected for the printer profile in the desktop Print Client.
Check that Application, Region or techOMS environment, Name, and Api secret match the connection you configured.
Print a supported document from your selected application and verify that it reaches the intended physical printer.
If printing fails, review the connection settings and your printer's local availability before trying again.
Once your document prints successfully, your new printer profile is verified and ready to print shipping documents.