How to Configure and Manage Markup Profiles in techSHIP [Step-by-Step Guide]
Last updated: October 14, 2026
You can create and maintain Markup Profiles in techSHIP to organize dated pricing configurations through Periods, including their Service Groups, markup matrices, and surcharge settings.
This guide covers creating and editing profiles, creating and maintaining Periods, managing Service Groups and Surcharges within a Period, copying Periods, changing profile status, restoring profiles from backup, and reviewing Change History.
Before You Begin
Before you begin, make sure to read 📄 Understanding Markup Profiles in techSHIP [Guide] for a comprehensive explanation of how this feature works.
Using this functionality requires special user permissions. Check the required access level by referring to 📄 techSHIP User Permissions Structure [Information].
Prepare the Pricing Dimension and Zone & Area you will select during profile creation. For those procedures, refer to 📄 How to Configure Pricing Dimensions in techSHIP [Step-by-Step Guide] and 📄 How to Configure Zones & Areas in techSHIP [Step-by-Step Guide].
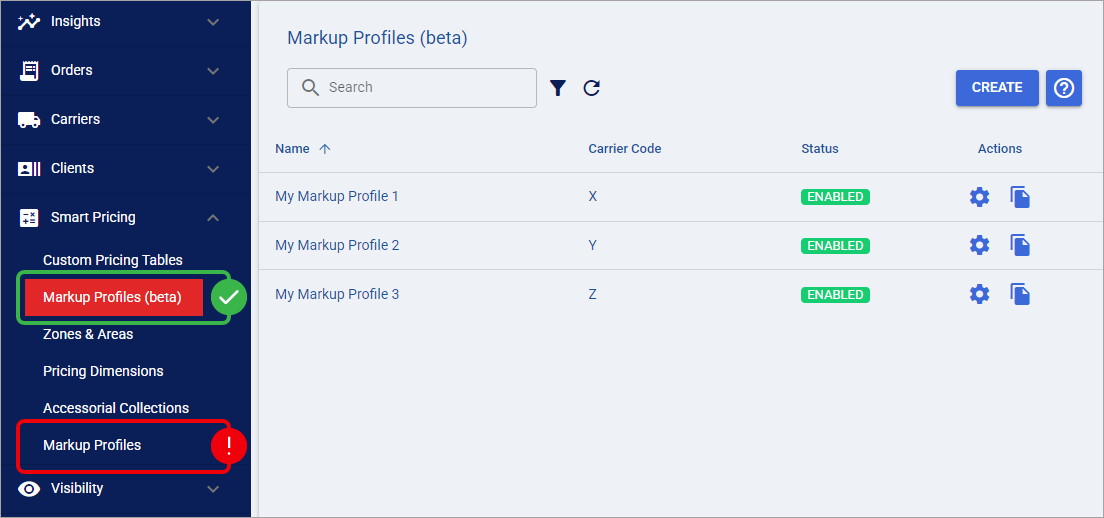
To access the Markup Profiles page, click Markup Profiles (beta) from the left menu in the Smart Pricing section.
Create and Edit a Profile
Create a Profile
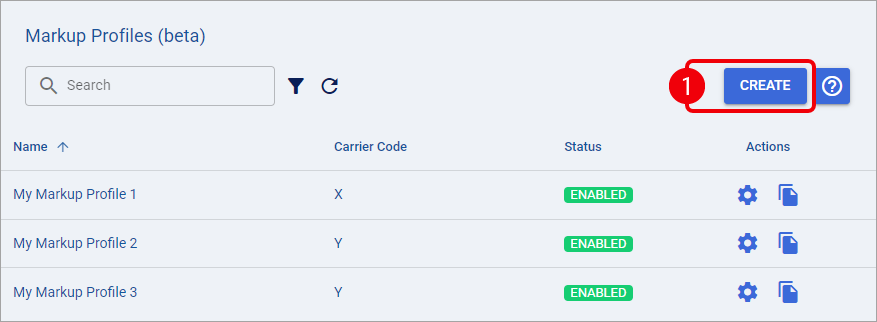
From the profile list, click Create.
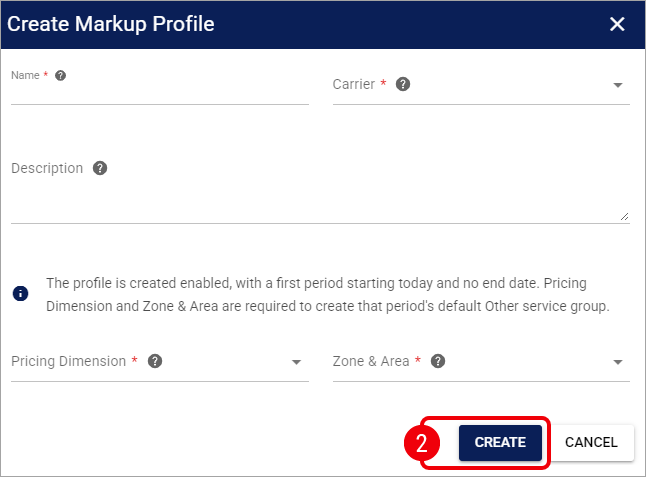
In Create Markup Profile, complete the following fields and click Create:
Name: Enter a descriptive profile name.
Carrier: Select the Carrier by its name. Check your selection carefully because you cannot change the Carrier after creating the profile.
Description: Describe the profile's purpose or intended use.
Pricing Dimension: Select the prepared Pricing Dimension for the first Period's default Other Service Group.
Zone & Area: Select the prepared Zone & Area for the first Period's default Other Service Group.
You have created an Enabled profile with an initial Period that starts on the current date, has no End Date, and contains the default Other Service Group.
Continue by reviewing the Period and completing its Service Groups, matrices, and Surcharges before assigning the profile to a Client Account.
Edit Profile Details
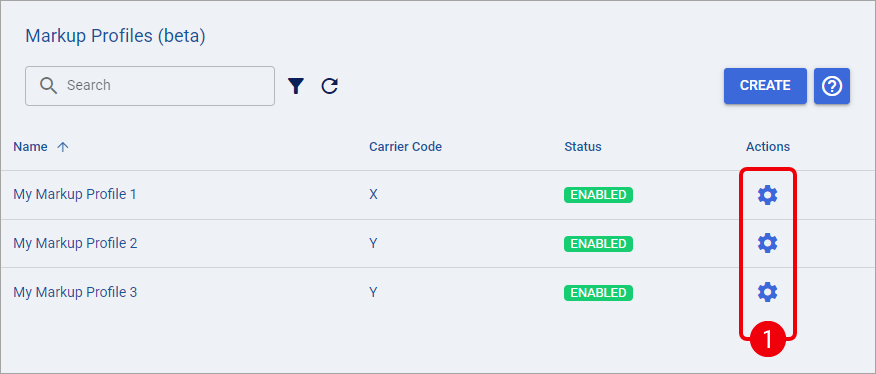
Open the profile you want to update by clicking its Settings icon.
In the profile header, update the relevant fields:
Name: Update the profile's descriptive name.
Description: Update its purpose or intended use.
You cannot change Carrier after creation.
Select Save in the profile header.
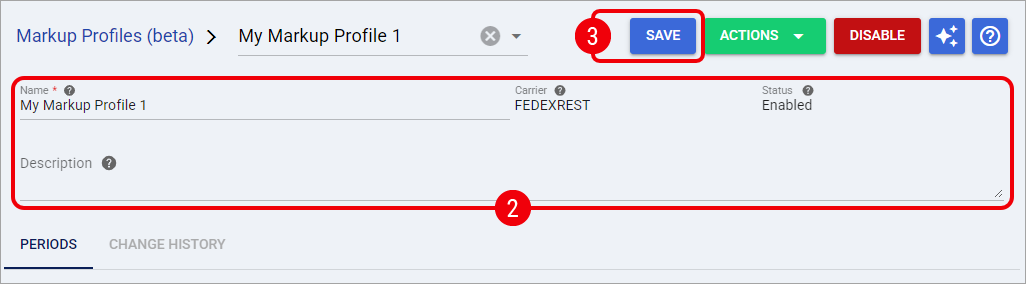
Your profile details are saved. Continue with the Periods tab to maintain the dated pricing configurations that belong to the profile.
Maintain Periods
Open the profile's Periods tab to review its dated pricing configurations. The list displays Start Date, End Date, Status, Service Groups, and the available Actions.
A Period's Status is determined automatically from its dates and appears as Upcoming, Current, or Ended. You do not enable or disable an individual Period.
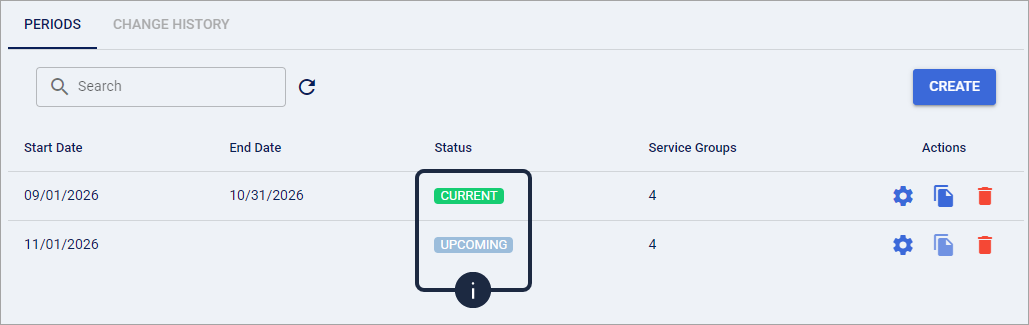
Periods in the same profile cannot overlap or share a calendar day. Both boundary dates are inclusive. You can leave gaps between Periods, but processing can fail when the applicable date is not covered by any Period. For the complete scheduling rules, refer to 📄 Understanding Markup Profiles in techSHIP [Guide].
Create a Period
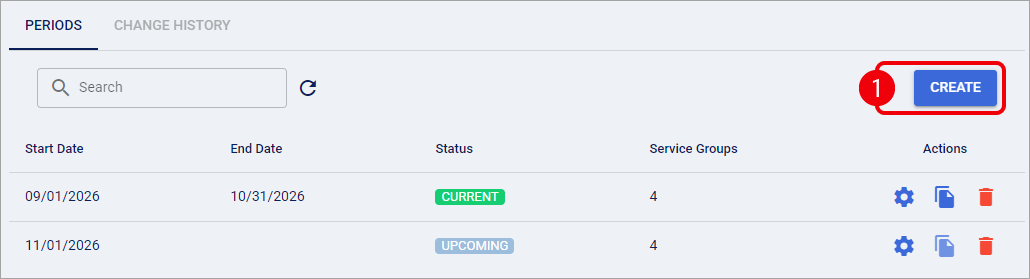
On the Periods tab, select Create.
In Create Period, complete the following fields and click Create:
Start Date: Select the required start date for the Period.
End Date: Select an end date on or after Start Date, or leave it blank to create an open-ended Period.
Pricing Dimension: Select the Pricing Dimension for the new Period's default Other Service Group.
Zone & Area: Select the Zone & Area for the new Period's default Other Service Group.
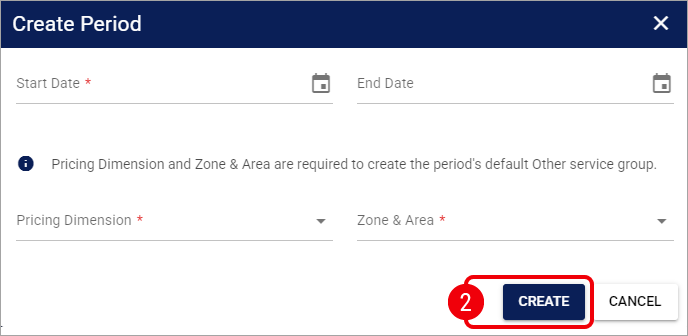
You have created a new Period with its own default Other Service Group and an empty markup matrix. Continue by opening the Period to configure its Service Groups and Surcharges, or use Copy instead when the new Period should inherit an existing pricing configuration.
Edit a Period
On the Periods tab, locate the Period and click its Settings icon to open it.
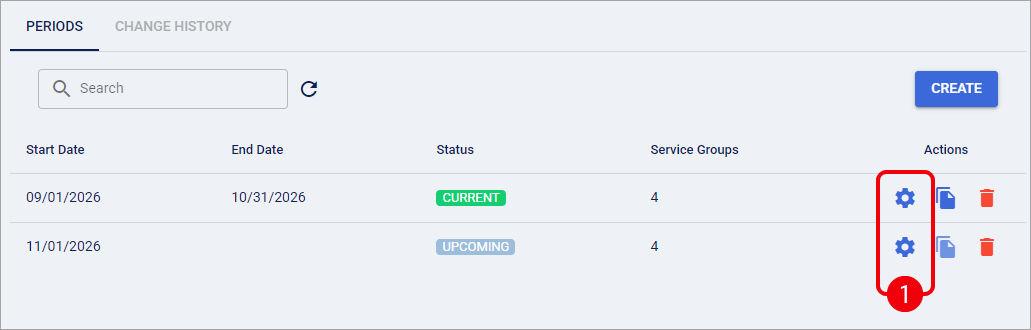
In the Period header, update Start Date or End Date as needed, then select Save.
Start Date: Keep a date that does not overlap another Period.
End Date: Select a date on or after Start Date, or clear the field to make the Period open-ended.
Select Save in the period header.

Your Period dates are saved and its Status is recalculated automatically. Continue by reviewing the Period's Service Groups and Surcharges if the new dates affect how you intend to use that pricing configuration.
Copy a Period
Copy is unavailable for an open-ended source Period. Assign an End Date to the source Period before you create a later copy.
On the Periods tab, locate the finite source Period and click its Copy icon.
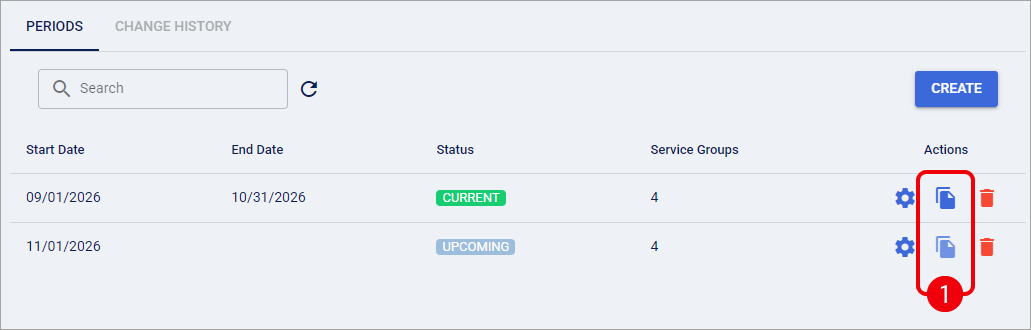
In Copy Period, review or update the suggested dates and click Copy:
Start Date: The suggested date is the first uncovered day after the source Period ends, normally the next calendar day.
End Date: When another Period already exists later in the timeline, the suggested date is the day before that Period begins. When no later Period exists, End Date can remain blank.
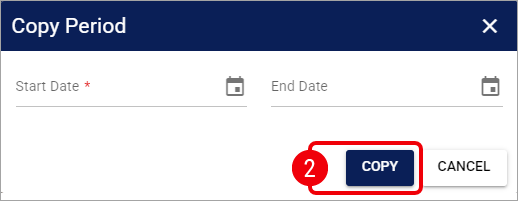
The copied Period contains independent copies of the source Period's Service Groups, Service assignments, markup matrix values, and Surcharges. Any Surcharge date windows are shifted with the copied Period so their relative timing is preserved.
Your copied Period is now available under the same Markup Profile. Continue by reviewing its dates and pricing configuration before relying on it for future pricing.
Delete a Period
Deleting a Period also removes its Service Groups, markup values, and Surcharges. If you delete the profile's last Period, techSHIP automatically disables the parent profile.
On the Periods tab, click the Delete icon for the Period you want to remove.
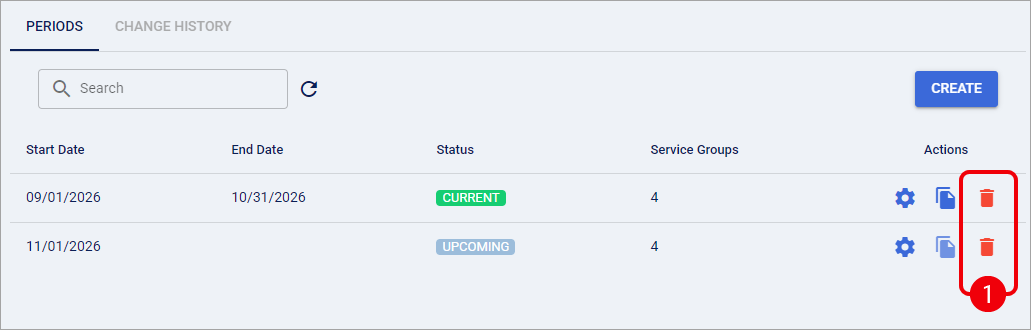
In the confirmation dialog, review the deletion message and select OK to proceed.
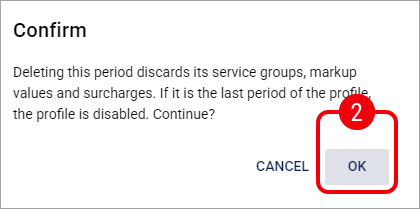
You have removed the selected Period and its pricing configuration. Review the remaining Period timeline before continuing to use or enable the profile.
Maintain Service Groups
Open the intended Period, then select its Service Groups tab. Use Search to narrow the list, or select Filter to apply an advanced filter.

Create a Service Group
You cannot select a Service already assigned to another regular group in the selected Period. The selector disables that option and identifies its owning group. To move the Service, remove it from the existing group and Save that change before selecting it in the destination group.
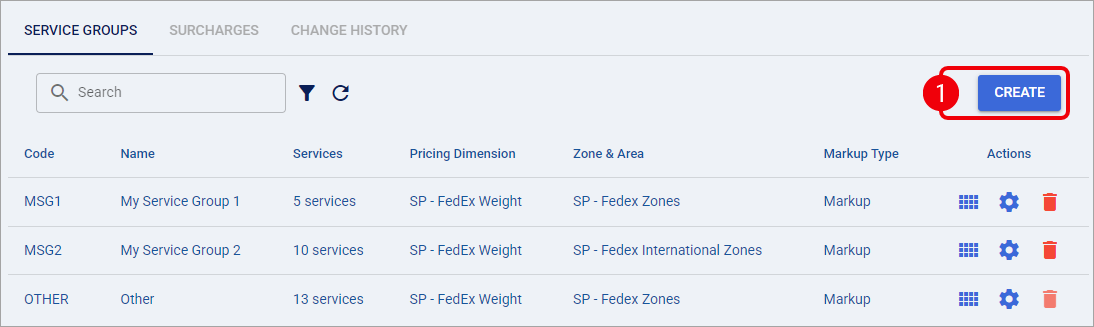
On the Service Groups tab, select Create.
In Create Service Group, complete the following fields and click Create:
Code: Enter a code unique within this Period. Do not use the reserved code OTHER. You cannot edit the code after creating the group.
Name: Enter a descriptive group name.
Services: Select the Carrier Services you want to assign to the group.
Pricing Dimension: Select the Pricing Dimension for the group's markup matrix.
Zone & Area: Select the Zone & Area for the group's markup matrix.
Markup Type: Select the calculation type for your configuration. For the differences between types, refer to Understanding Markup Profiles in techSHIP.
Minimum Markup ($): Enter the group-level minimum for your configuration, when applicable.
Include Tax Into Fee Markup Calculation: Select or clear the checkbox according to your tax-inclusion requirements.
Force Markup When Missing Carrier Charge: Select or clear the checkbox according to your missing-charge requirements. Review its documented scope in Understanding Markup Profiles in techSHIP before using it.
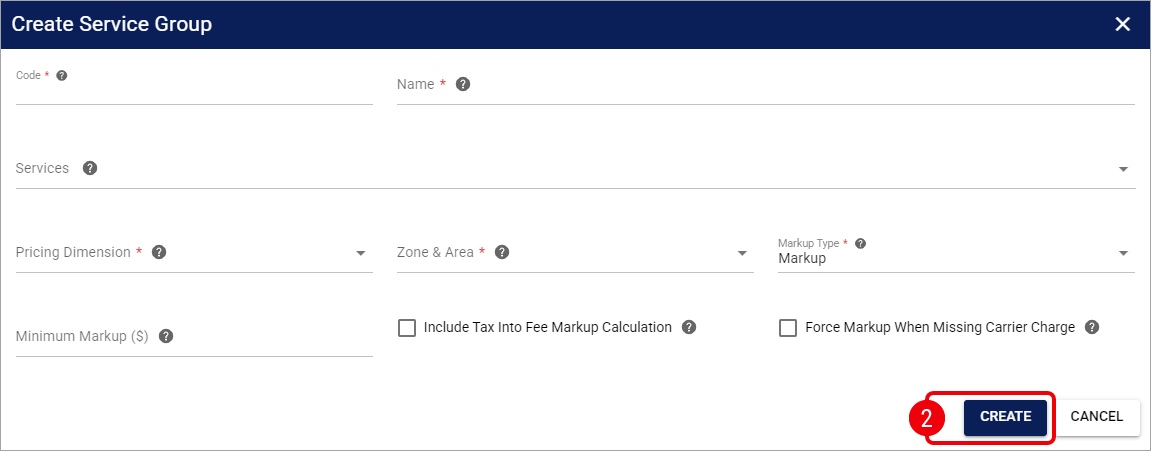
Your Service Group is saved in the selected Period. To populate its matrix, follow 📄 How to Edit Markup Matrices in techSHIP [Step-by-Step Guide].
Edit a Service Group
Changing Pricing Dimension or Zone & Area discards the group's existing matrix values when you save. Review the maintenance consequences in 📄 Understanding Markup Profiles in techSHIP [Guide] before changing either field.
On the Service Groups tab, locate the group and click the Settings icon in its Actions column.
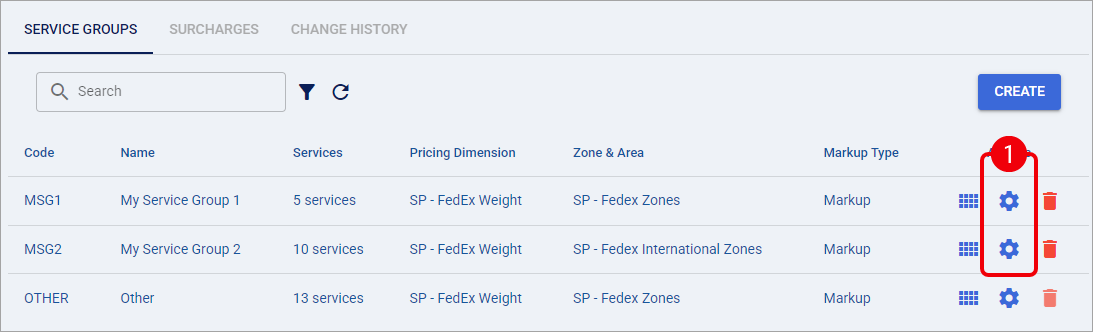
In Edit Service Group, update the settings described in Create a Service Group.
Code remains read-only. To remove a selected Service, select the removal icon on its chip; to add a Service, choose an available option from Services. Review any matrix-reset warning, then select Save.

Your Service Group changes are saved within the selected Period. Open Markup values to review the group's matrix, particularly after changing Pricing Dimension or Zone & Area.
Edit Other
To change which Services appear in Other, update their assignments in the regular Service Groups within the selected Period. You cannot add or remove Services directly in Other, rename it, or delete it.
On the Service Groups tab, locate Other and click the Settings icon in its Actions column.
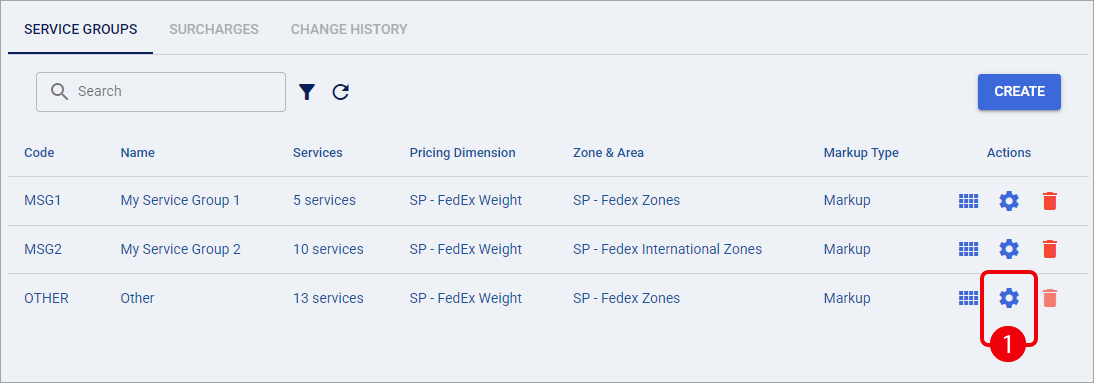
In Edit Service Group, review the read-only identity and Service membership, then update the relevant settings and click Save:
Code, Name, and Services: Review these values; you cannot edit them directly.
Pricing Dimension: Change the Pricing Dimension when needed.
Zone & Area: Change the Zone & Area when needed.
Markup Type: Adjust the calculation type.
Minimum Markup ($): Adjust the group-level minimum.
Include Tax Into Fee Markup Calculation: Adjust the tax-inclusion setting.
Force Markup When Missing Carrier Charge: Adjust the missing-charge setting.
The same matrix-reset warning applies when you change Pricing Dimension or Zone & Area.
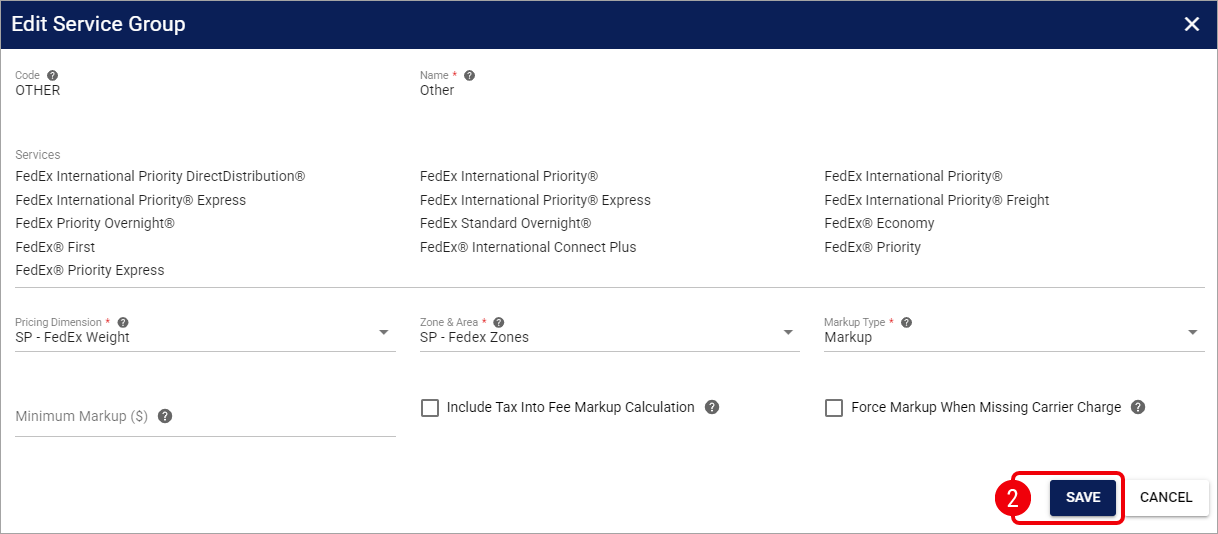
Your Other settings are saved for the selected Period. Select its Markup values action to review or complete its matrix.
Delete a Service Group
Deleting a regular Service Group also deletes its matrix values. Review the group-deletion consequences in 📄 Understanding Markup Profiles in techSHIP [Guide] before proceeding.
On the Service Groups tab, click the Delete icon for the intended group. You cannot delete Other.

Click OK to confirm the action.
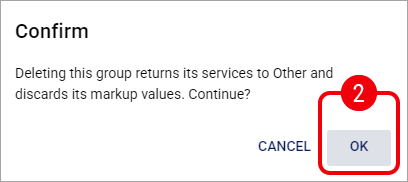
You have removed the Service Group from the selected Period. Review Other and the Period's remaining Service assignments before continuing.
Maintain Surcharges
Open the intended Period, then select its Surcharges tab. Use Search to narrow the displayed records and Refresh to reload them when needed.
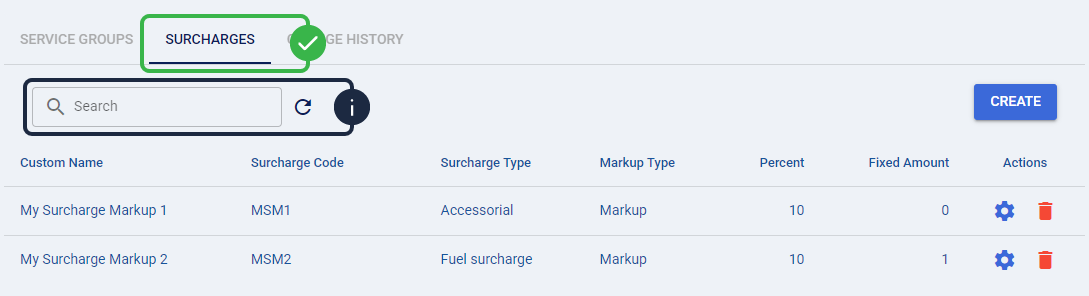
All Surcharge records you create or maintain here belong to the selected Period. To choose the appropriate surcharge type and calculation settings, review the surcharge guidance in 📄 Understanding Markup Profiles in techSHIP [Guide].
Create a Surcharge
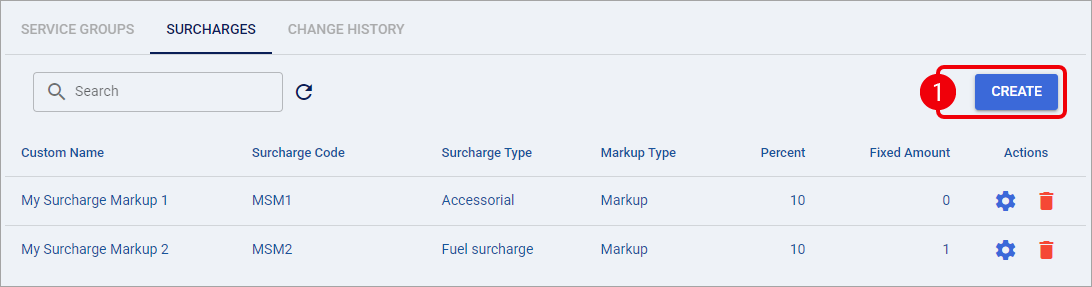
On the Surcharges tab, select Create.
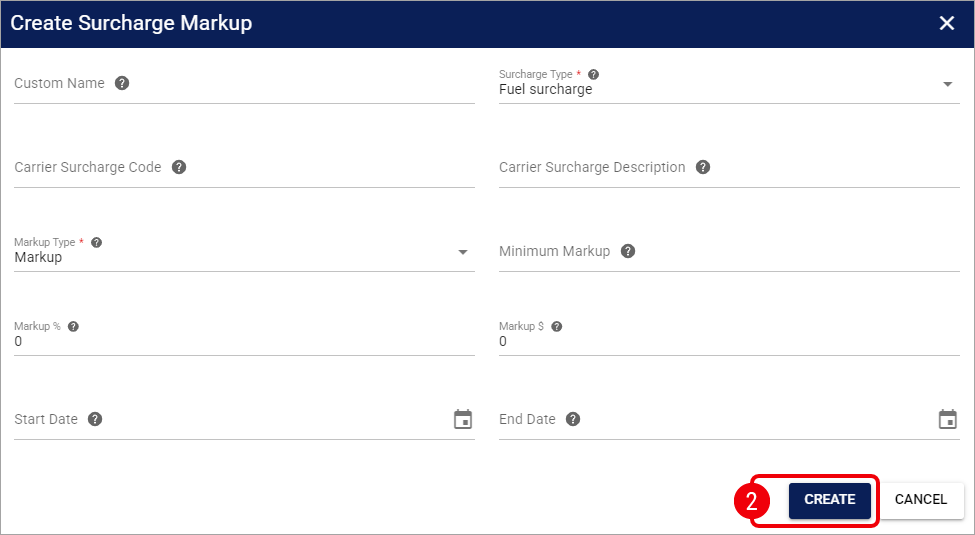
In Create Surcharge Markup, complete the following fields and click Create:
Custom Name: Enter a descriptive label when needed.
Surcharge Type: Select the surcharge category.
Carrier Surcharge Code: Enter the Carrier's surcharge code when applicable to your configuration.
Carrier Surcharge Description: Enter the Carrier surcharge description when applicable.
Markup Type: Select the calculation type.
Minimum Markup: Enter the surcharge-specific minimum when applicable.
Markup %: Enter the percentage for your surcharge configuration.
Markup $: Enter the fixed amount for your surcharge configuration.
Start Date: Set a start date when you need to limit the surcharge's effective period.
End Date: Set an end date when you need to limit the surcharge's effective period, or leave it blank for no end date.
Your Surcharge is saved within the selected Period. You can continue configuring the Period's remaining Surcharges.
Edit a Surcharge
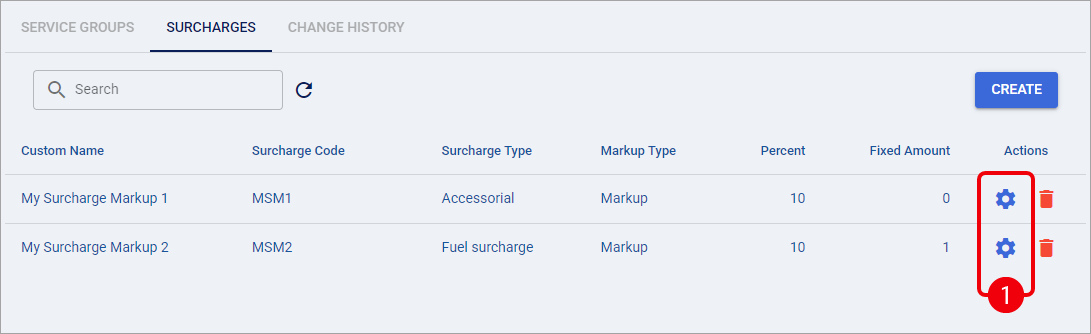
On the Surcharges tab, locate the record and select the Settings icon in its Actions column.
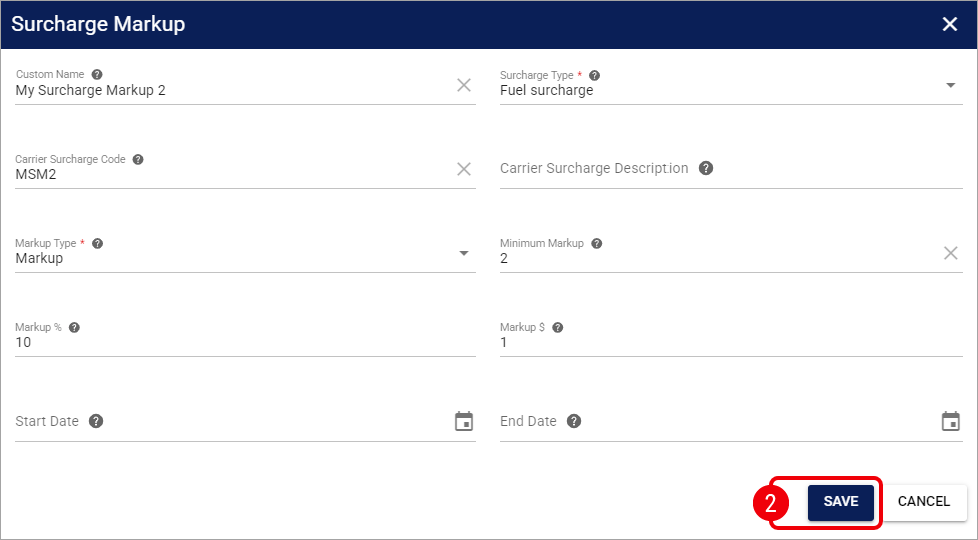
In Surcharge Markup, update the relevant fields using the descriptions in Create a Surcharge, then click Save.
Your Surcharge changes are saved within the selected Period. Review the remaining records before completing the Period configuration.
Delete a Surcharge
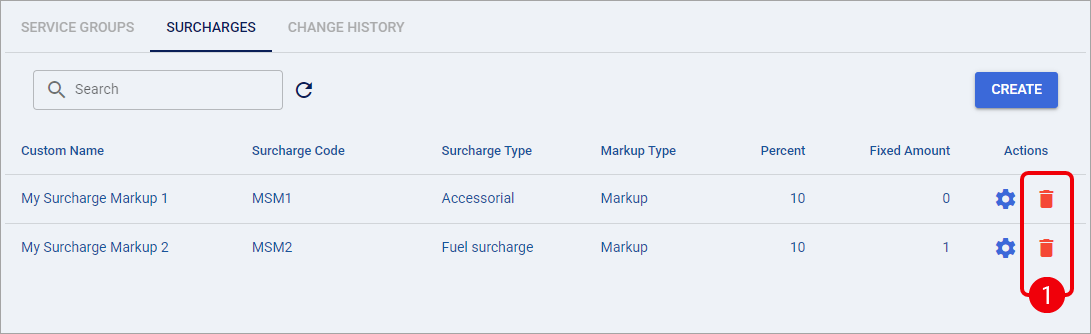
On the Surcharges tab, click the Delete icon for the intended surcharge.
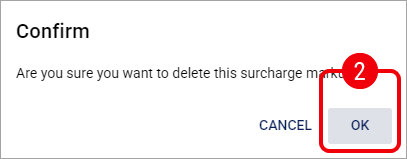
Click OK to confirm the action.
You have removed the selected Surcharge from the Period. Review the remaining Surcharge configuration before continuing to use that Period.
Enable or Disable a Profile
Enable a Profile
You cannot enable a Markup Profile that has no Periods. If no Period remains, techSHIP displays Add a period before enabling this markup profile.
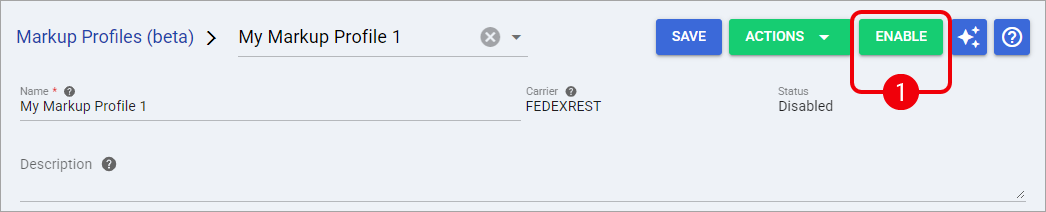
Open the disabled profile and review its details and Periods. For each Period you intend to use, review its dates, Service Groups, matrix values, and Surcharges. Then, click Enable in the profile header.
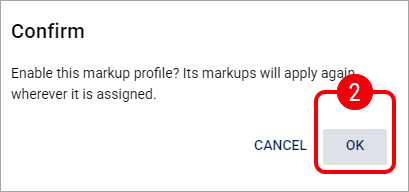
In Confirm, review the message and select OK to proceed.
Your profile is now Enabled. Continue by reviewing or configuring its Client Account assignments; enabling a profile does not complete that separate task.
Disable a Profile
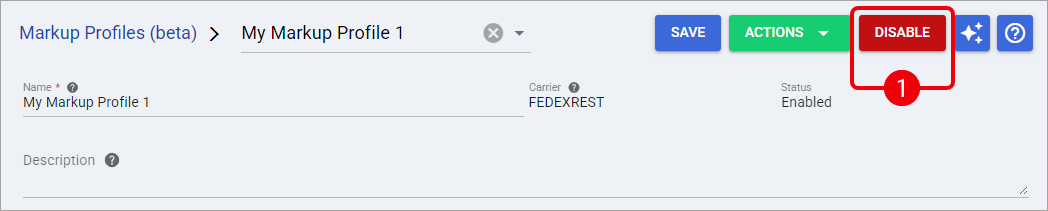
Open the profile and select Disable.
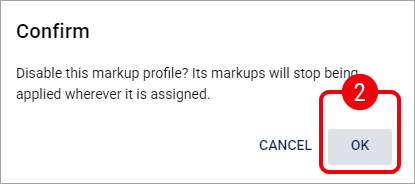
In Confirm, review the message and select OK to proceed.
Your profile is now Disabled. Its Periods and pricing configuration remain saved, but the disabled profile does not apply pricing. Use the list's Enabled filter to locate it later, and verify the affected Client Account configuration before processing additional orders.
Restore a Profile from Backup
You start a profile restore from the Markup Profile page, not from a Period, Service Group, or Markup values matrix.
From Smart Pricing > Markup Profiles (beta), locate the profile you want to restore and select its Settings icon to open the profile.
In the profile header, select Actions > Restore from backup.
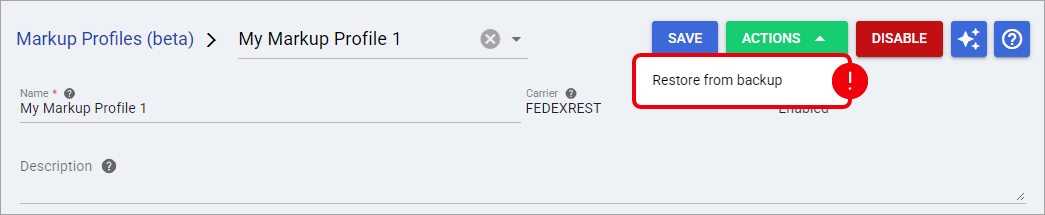
The standard Markup Profiles (beta) list does not provide a self-service restore entry point for a deleted Markup Profile. A Disabled profile is different and can still be located by using the list's Enabled filter.
The Restore from backup dialog opens with the snapshot selector. Continue with Configuration Backups and Restore in techSHIP to select a backup, review its effects, and complete the restore.
Review Change History
You can review Change History at following levels:
From the Markup Profile, open Change History to review profile-level changes and Period lifecycle changes, such as Period creation, date changes, and deletion.
From the selected Period, open Change History to review changes within that Period, including applicable Service Group, Service, Surcharge, and period-scoped import activity.
To review a Service Group's markup-value history, open the selected Period's Service Groups tab, select Markup values for the group, and then open Change History.
Automatic movement from one applicable Period to the next does not create a Change History entry because no separate switch action occurs.
You have opened the relevant change log. Continue with 📄 How to Review Change History Logs for Supported Entities [Step-by-Step Guide] for the log-review procedure.
Continue Your Setup
After reviewing your profile settings, Periods, Service Groups, markup matrices, Surcharges, and status, follow 📄 How to Assign Markup Profiles to Client (Billing) Accounts in techSHIP [Step-by-Step Guide] to configure where the parent Markup Profile is used.
For file-based maintenance of a selected Period, refer to 📄 How to Import and Export Markup Profile Data in techSHIP [Step-by-Step Guide].