How to Bulk Update Tracking Tags [Step-by-Step Guide]
Last updated: October 29, 2026
This guide explains how to bulk update tracking tags in techTRACK using a CSV file.
You can add tags to existing trackings or replace their current tags, review upload results, and manage your upload history.
To access the Bulk Update Tracking Tags feature, you must have the required permissions as detailed in 📄 techTRACK User Permissions Structure [Information].
Download and Prepare the CSV File
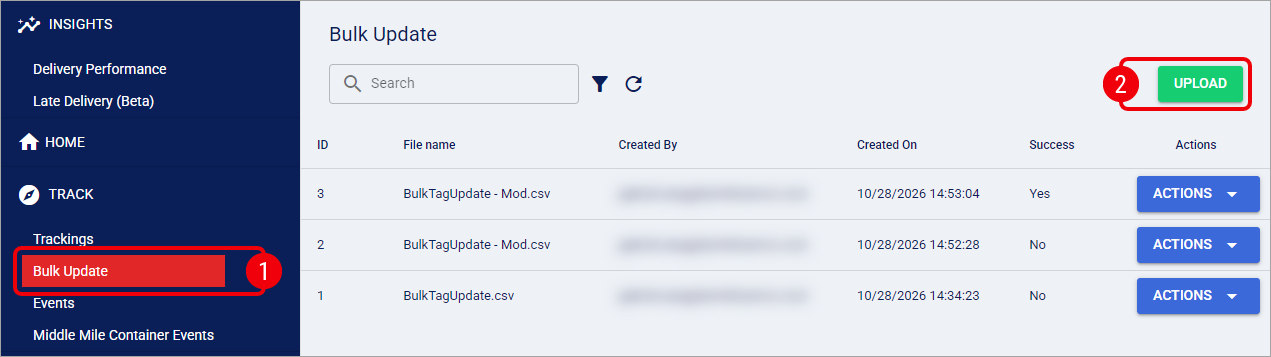
In techTRACK, navigate to Track → Bulk Update.
Click Upload to open the upload dialog.
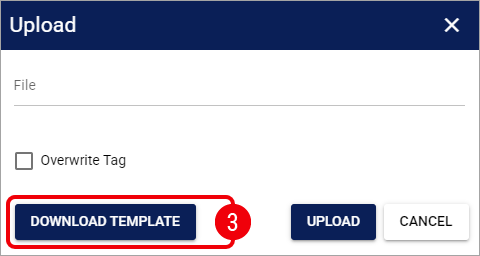
Click Download Template to download the
BulkTagUpdate.csvfile.
Open the downloaded CSV template and replace the example records with your own tracking information. Keep the three expected columns without adding or duplicating columns.
Save your completed file using commas as field separators.
CSV File Requirements
Your CSV file must meet the following requirements:
Requirement | Description |
|---|---|
File format |
|
File size | Maximum 2 MB |
File name | Maximum 255 characters |
Data rows | Between 1 and 1,000 rows, excluding the header |
Columns | Exactly |
The downloadable template provides the recommended column names and order. You can use a different column order, but retaining the template structure helps prevent formatting errors.
Complete the following CSV columns:
Column | Description |
|---|---|
Carrier | Required. Enter a configured techTRACK Carrier code, rather than the Carrier's display name. Maximum 255 characters. |
TrackingNumber | Required. Enter the tracking number you want to update. Maximum 128 characters. |
Tags | Enter the tags you want to add or replace. Separate multiple tags with commas. You can leave this field blank, depending on the intended update. |
When entering multiple tags, enclose the cell value in double quotation marks, such as "priority,express", so the CSV treats it as one field. A comma separates tags and cannot be included as part of an individual tag.
Keep the following considerations in mind when preparing your tracking data:
Tracking numbers: Preserve their original text, including leading zeros. Avoid spreadsheet formatting that converts tracking numbers into scientific notation.
Carrier codes: Use configured Carrier codes. The template provides examples, but it is not an exhaustive list of supported Carriers.
Duplicate entries: Include only one row per Carrier and tracking number combination. Subsequent duplicate entries will fail rather than merge.
Tracking matching: The system identifies trackings using the Carrier, TrackingNumber, and current organization. If multiple historical records match, the most recently created matching tracking is updated. You cannot target a specific historical occurrence or account through the CSV.
Choose How Tracking Tags Are Updated
The Overwrite Tag checkbox controls how the uploaded tags affect existing tags. It is unchecked by default.
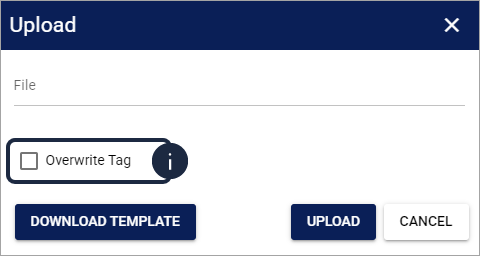
Overwrite Tag | Uploaded Tags | Result |
|---|---|---|
Unchecked (default) | Contains tags | Adds new tags while preserving existing tags. |
Unchecked | Empty | Preserves the existing tags without changes. |
Checked | Contains tags | Replaces all existing tags with the uploaded tags. |
Checked | Empty | Removes all existing tags from the matched tracking. |
The system automatically trims surrounding spaces, removes empty tag entries, and prevents duplicate tags regardless of capitalization.
The resulting tag set must not exceed 255 characters, including comma separators. When Overwrite Tag is unchecked, this limit applies to the combination of existing and newly uploaded tags.
If you select Overwrite Tag, any empty Tags cell will remove all existing tags from its matched tracking. This also applies to values containing only spaces or empty comma-separated entries.
The selected Overwrite Tag behavior applies to the entire uploaded file. The Bulk Update feature does not provide an undo option, and the uploaded CSV does not contain a backup of the previous tags.
Upload the CSV File
In techTRACK, navigate to Track → Bulk Update.
Click Upload to open the upload dialog.
Click File to select the file to upload, and configure Overwrite Tag according to your intended operation:
Leave Overwrite Tag unchecked to add tags while preserving existing ones.
Select Overwrite Tag to replace existing tags with the values in your CSV file.
Click Upload to submit the file for processing.
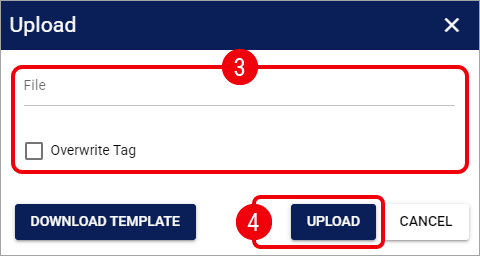
Once the upload has been processed, you can review the number of successfully processed and failed rows. Continue to Upload result to determine whether any corrections are necessary.
Review Upload Results
To inspect an upload, locate its entry in the Bulk Update history table and select Actions → Upload result.
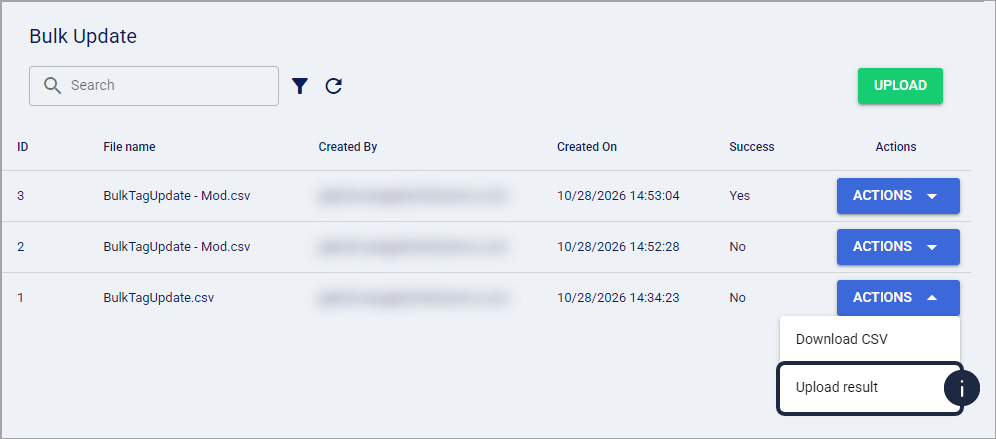
The Upload result dialog displays the following information:
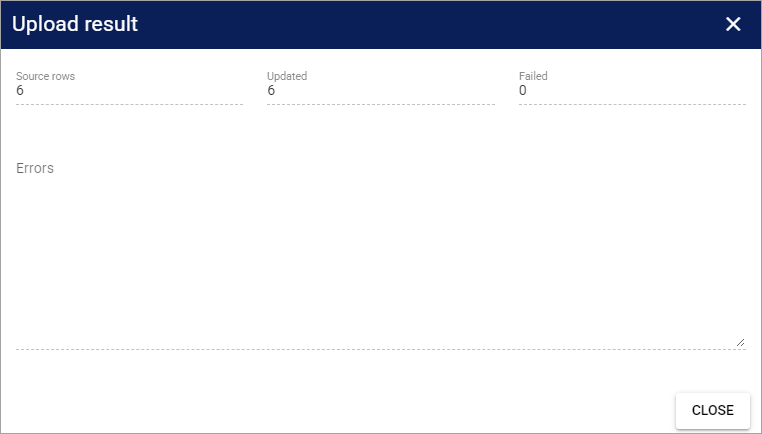
Field | Description |
|---|---|
Source rows | Total number of parsed data rows in your CSV file, excluding the header. |
Updated | Number of successfully processed rows. This does not necessarily mean the tag values changed. |
Failed | Number of rows that could not be processed successfully. |
Errors | Details about processing failures, including the affected CSV row, tracking number when available, and reason for failure. |
Understand Upload Statuses
The Success column in the upload history indicates the overall outcome:
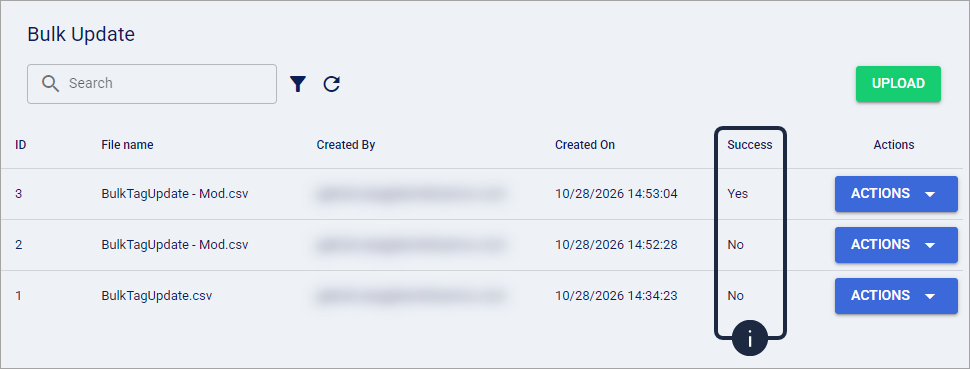
Status | Meaning |
|---|---|
In progress | The upload has not yet reached a finalized result. |
Yes | All source rows were processed successfully. |
No | At least one row failed, or the entire upload failed. |
Success = No does not necessarily mean that no changes were made. If your CSV contains both valid and invalid rows, the system can update the valid rows while rejecting the invalid ones.
Always check Updated, Failed, and Errors before attempting another upload.
A file-level validation or processing failure prevents changes from that upload from being committed. In contrast, row-level errors generally affect only their corresponding rows.
If a CSV cannot be parsed, Source rows and Failed may both display zero despite an upload failure. Review Errors to understand the outcome.
Fix Upload Errors
If an upload contains failed rows, open Actions → Upload result and review the Errors field.
Errors generally identify the CSV row number, the tracking number when available, and the reason for failure. For a standard CSV with one record per line, the first data row is row 2, because row 1 contains the headers.
Common upload errors and their resolutions include:
Error | Recommended Action |
|---|---|
Invalid CSV structure | Verify that your file contains the three expected columns, without missing, duplicate, or extra columns. Enclose comma-separated tag values in double quotation marks. |
Unknown Carrier code | Verify that the Carrier value matches a configured code in techTRACK. |
Tracking not found in this organization | Confirm the Carrier, TrackingNumber, and current organization. Only existing trackings within that organization can be updated. |
Duplicate tracking in the file | Remove duplicate entries for the same Carrier and tracking number combination. |
Combined tags cannot exceed 255 characters | Reduce the resulting tag values to fit within the 255-character limit, including separators and any existing tags retained in additive mode. |
File or row limit exceeded | Verify that your CSV does not exceed 2 MB or 1,000 data rows. |
Reupload Corrected Records
Review the Errors field and identify the affected CSV records.
Correct the invalid Carrier, TrackingNumber, or Tags values, or resolve any file-format errors.
If the original upload partially succeeded, prepare a new CSV containing only the corrected failed rows. If the entire file failed validation, correct and resubmit the affected file.
Reupload the file using the procedure described above.
Verify the Upload result using the procedure described above, and check the Updated, Failed, and Errors values.
Bulk Update does not provide a dedicated Retry action. Correcting failed records requires a new upload. Error details may also be truncated when many rows fail; the Failed count still includes failures that are not individually displayed.
Manage Upload History
The Bulk Update page maintains an accessible history of uploads from the last 90 days.
You can review uploads submitted by authorized administrators within your current organization, including files uploaded by someone else.
The history table contains the following columns:
Column | Description |
|---|---|
ID | Unique identifier of the upload. |
File name | Name of the uploaded CSV file. |
Created By | Identifies who submitted the upload. |
Created On | Date and time when the upload record was created. |
Success | Displays the overall processing status. |
Actions | Provides access to the upload results and the original CSV file when available. |
Download an Uploaded CSV File
Locate the desired upload in the history table, click Actions for that upload, and select Download CSV to retrieve the originally submitted file, if it remains available.
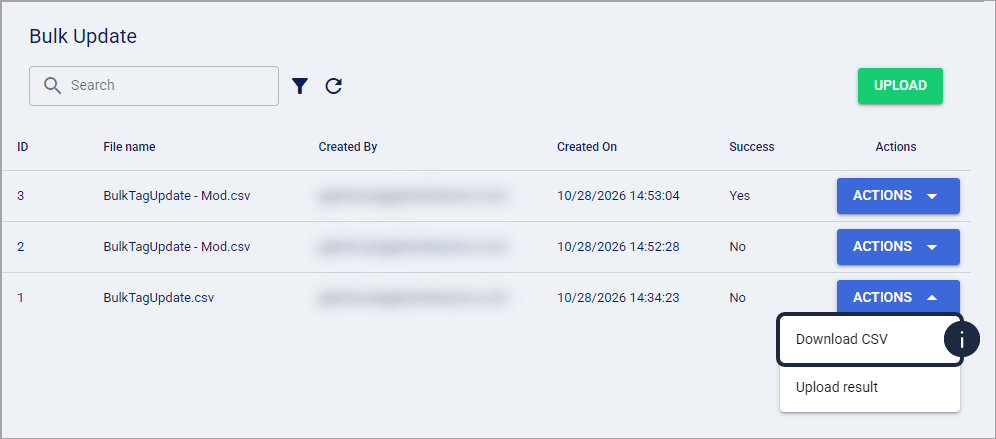
The downloaded CSV contains the original uploaded data, not an error report or the previous tracking tag values.
Upload history, upload results, and original-file downloads are accessible through this feature for a rolling 90-day window. An original file may also become unavailable, in which case the download returns an explanatory error. The history is not a permanent audit archive or a backup for restoring previous tags.
Search and Filter Upload History
Use the following filters to narrow down entries:
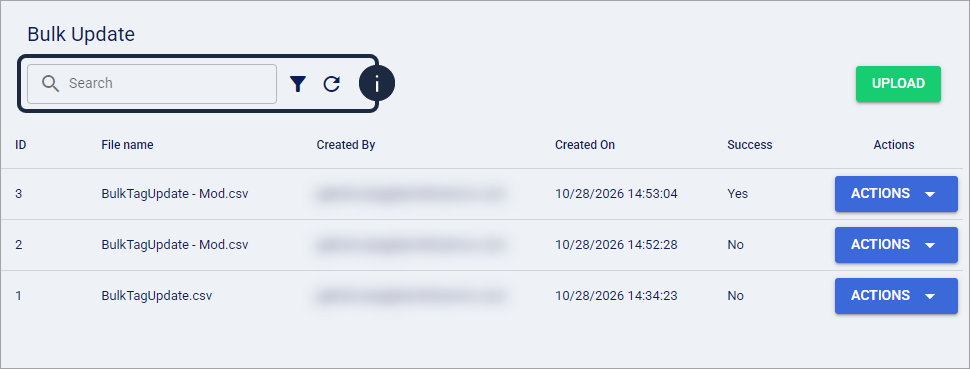
Search: Find uploads by matching part of the File name or Created By value.
Advanced Filter: Open the advanced filtering dialog to filter uploads by creation dates and processing success.
The Advanced Filter dialog contains:
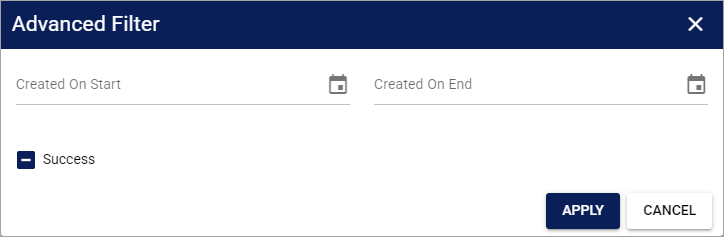
Field | Description |
|---|---|
Created On Start | Optional inclusive starting date and time for the upload history. |
Created On End | Optional inclusive ending date and time for the upload history. |
Success | Filters uploads according to their processing status. |
The Success checkbox supports three states:
Indeterminate (minus symbol): Applies no success-status filter.
Checked: Displays uploads with Success = Yes.
Unchecked (empty box): Displays uploads with Success = No.
The Checked and Unchecked filters exclude uploads whose status is In progress.