How to Pack Shipments [Step-by-Step Guide]
Last updated: September 29, 2026
The techOMS packing workspace allows you to manually allocate order lines into physical boxes directly within the application, providing full control over the fulfillment process without requiring external systems.
This guide covers how to access the packing workspace, create packages, assign shipment lines, and successfully finalize the packing process.
 | We highly recommend reading Understanding the techOMS Packing Module [Information] to fully understand the necessary account configurations, eligibility rules, and inventory impacts associated with this workflow. |
TABLE OF CONTENTS
- Accessing the Packing Workspace
- The Packing Process
Accessing the Packing Workspace
Before beginning, ensure your target shipment is eligible for manual packing by verifying it is in the Ready To Send, Packing, or Packed status.
| Make sure that you are operating at the correct Account from the top header before proceeding. |
 | Click Shipments from the left menu under the Sales section. |
 | Click on the specific Shipment # you need to pack. |

 | Click Pack and Fulfill to begin the process. |

 | If your shipment is in the Ready To Send status, click OK in the prompt to update the shipment status to Packing and access the workspace. |

The Packing Process
The three-step wizard guides you through the fulfillment process: packing items, calculating rates, and finalizing the shipment.

Step 1: Packing Items
The first step is to define the containers that will hold your items. You can repeat the procedures described below as many times as necessary to structure your shipment.

Creating a New Package
| Click Add within the Packages section. |

| The Add Package dialog appears. |
Here you can input standard dimensions such as Container Number, Weight, Length, Width, and Height.
To add custom key/value pairs, navigate to the References section within the dialog and input your data. Adding these references is optional.
Once finished, click Save to confirm the action.

The new package is now created and ready to receive items.
Editing or Deleting a Package
To modify an existing container, click Actions for the desired package:
- Select Edit to update the package properties.
- Select Delete to remove a container entirely.
| Deleting a package will automatically unpack any shipment lines associated with it, returning them to the main queue. |

Packing Items
In the Packages section, click on the specific container you want to fill. It will be highlighted to indicate it is the active package.

Then, use your preferred packing method: automated scanning or manually distributing quantities via the interface.
Method A: Using Barcode Scanning or Manual Entry
Place your cursor in the field located in the Scanner / Manual Entry section. Then scan the item's barcode using your hardware device, or manually type the item's UPC into the field and press Enter.

The system will automatically resolve the item and add a Quantity of 1 to your active package. Repeat this scan or entry to increment the quantity further.
| To learn how to configure UPCs for your products, refer to How to Edit a Product Variant or Details [Step-by-Step guide]. |
Method B: Manual Packing via Dialog
| Review the Shipment Lines grid on the left side of the screen and click the Pack button next to the specific SKU you want to process. |

| The Pack dialog appears. Enter the Quantity you wish to allocate to the selected package. |
If the product variant requires tracking, the dialog will dynamically display the Serial Number, Lot Number, and Expiration Date fields when pressing the plus icon. Enter or select this data as required.
Once finished, click Pack to confirm the action.
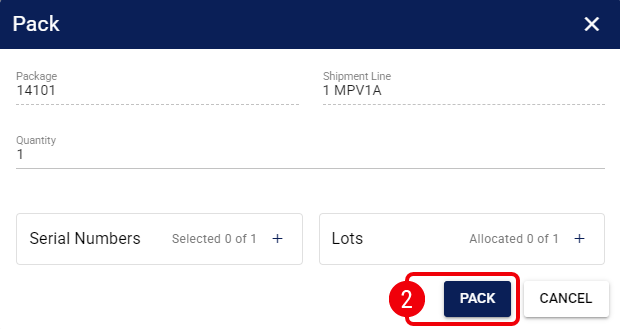
The system instantly updates the Remaining Quantity for that shipment line, and the items are now visibly nested under the selected package in the workspace.

Unpacking Items
If you make a mistake or need to remove an item from a package, you can unpack it to return the quantity to the main shipment queue.
| In the Packages section, select the target package to view its packed contents. |
| Click Actions next to the specific Package Line you wish to modify. |
| Select Unpack from the menu. |
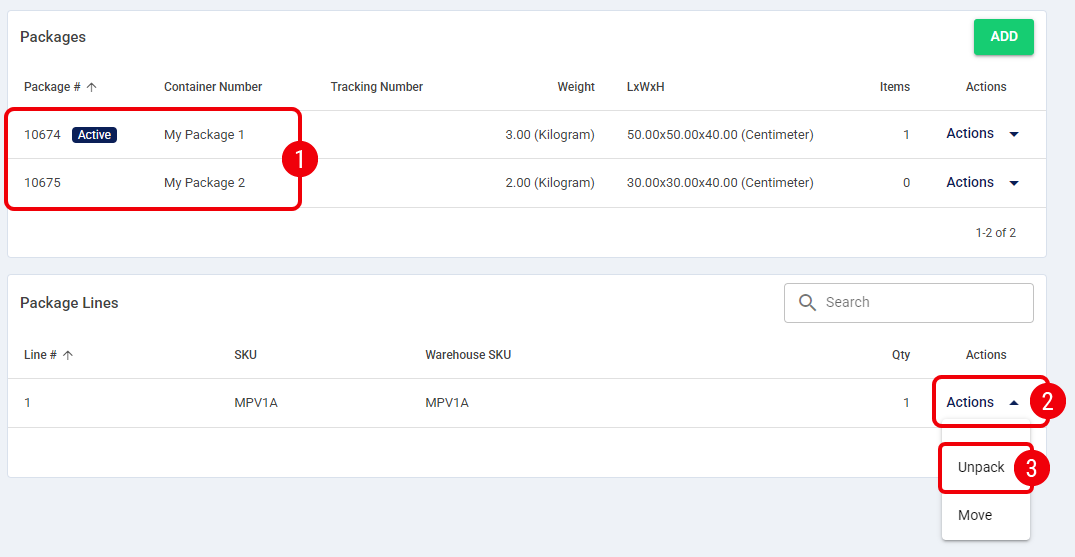
 | In the resulting dialog box, enter the specific Quantity to remove. |
If the item being manipulated is tracked, the dialog will dynamically display the Serial Number and Lot Number fields. You must explicitly input or select the specific serial or lot data of the items you are unpacking.
Once finished, click Unpack to confirm the action.

The items are now removed from the package and returned to the available Shipment Lines pool.
Moving Items Between Packages
You can transfer packed items directly from one container to another without unpacking them first.
| In the Packages section, select the source package to view its packed contents. |
| Click Actions next to the specific item line. |
| Select Move from the menu. |

| Select the Target Package from the drop-down menu and enter the Quantity you wish to transfer. |
Just like unpacking, if the item is tracked, the dialog will dynamically display the Serial Number and Lot Number fields. You must input or select the specific tracking data of the items being moved.
Once finished, click Move to confirm the transfer.

The items are now successfully transferred to the selected target package.
Move to the Next Step
This step encompasses all the packing actions described in the sections above. Ensure all items are allocated and that every package has valid dimensions before moving forward. Once ready, click Complete Packing, confirm, and proceed to the rate shopping stage. The shipment is consolidated and locked for the next phase.

| If you return to this step later and click Unpack, the shipment reverts to the Packing status. This action purges any previously saved shipping rates. |
Step 2: Calculating Rates
This step determines how your packages will be routed and priced.
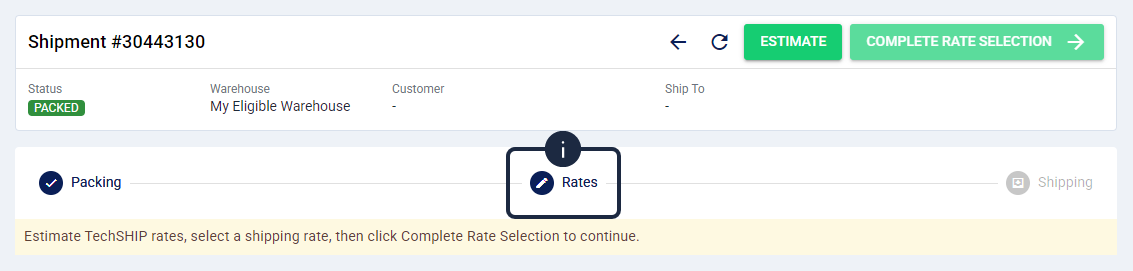
The available options depend on whether your warehouse uses the techSHIP integration.
Processing with techSHIP Integration
If your warehouse is integrated with techSHIP, the system can automatically calculate shipping costs. You can repeat this procedure if you need to re-estimate rates.
| Click the Estimate button to retrieve live shipping rates. |
| The system automatically selects the cheapest rate by default, but you can manually select a different option from the returned list if desired. |
 | If a warning icon appears next to your selection, it indicates that the carrier and service combination is not present in your master list. To resolve this, refer to How to Manage the Carriers and Services Master List: Create, Edit, Delete, Export, and Import [Step-by-Step Guide].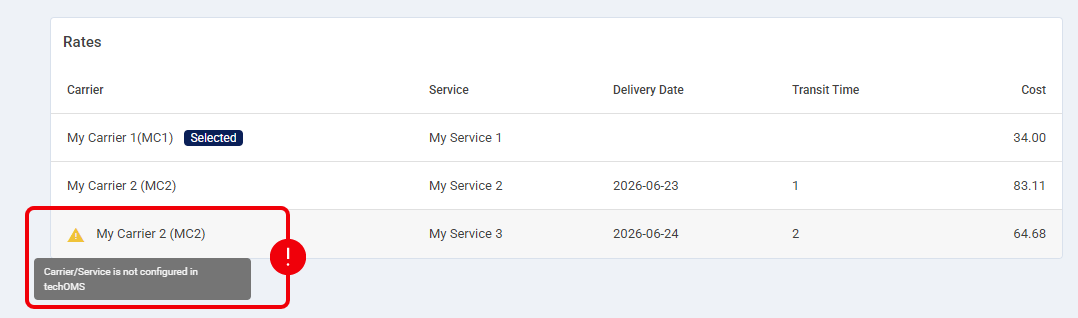 |
| Once the routing is configured, click Complete Rate Selection and confirm the action. |

The shipping rate and carrier service are now saved to the shipment.
| For error handling during rate estimation, refer to Understanding techSHIP Integration Retry Policies [Information]. |
Processing without techSHIP Integration
If your warehouse is not integrated with techSHIP, you must determine the routing manually.
| Select the appropriate Carrier and Service from the provided dropdown menus. |
| Once the routing is configured, click Complete Rate Selection and confirm the action to proceed. |

The shipping rate and carrier service are now saved to the shipment.
Step 3: Finalizing the Shipment
This final step concludes the fulfillment process and prepares the necessary documentation.

Processing with techSHIP Integration
| Click the Process and Fulfill button. |
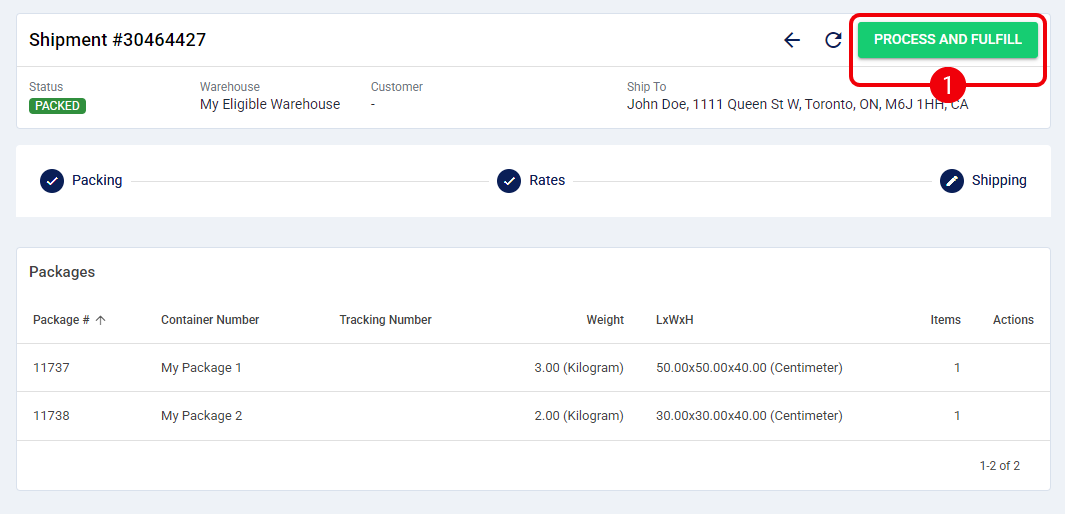
| Click OK to confirm the action. |

| The shipment status will briefly change to Processing while communicating with the carrier. Once complete, the status updates to Shipped (or Short Shipped).  |
| Generate your shipping documents. |
Use the checkboxes in the data grid to select specific packages, or leave them unchecked to process all packages by default.
- Exporting Documents: Click the Export dropdown button and select either Export Labels or Export Packing Slips to download a merged PDF file for your selection.
- Printing Documents: Click the Print dropdown button and select either Print Labels or Print Packing Slips to send the documents directly to your printer. If no packages are selected, a confirmation dialog will appear to verify that you want to print documents for all packages.
| Before attempting to print any documents, ensure your printer is available and selected in the global header switcher. Refer to:
|
|
|

The shipment is now successfully fulfilled, and tracking data is synced to the Sales Channel.
Processing without techSHIP Integration
You must manually edit each package in this step to input the correct Tracking Number before proceeding.
| Click Actions next to each targeted package in the Packages section and select Edit. |

| Enter the Tracking Number, and Save the information. |

| Click the Process and Fulfill button. |

| Click OK to confirm the action. |
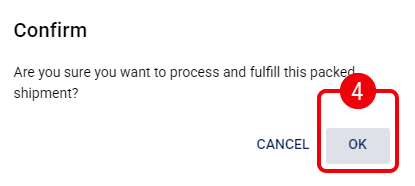
Once complete, the status updates to Shipped (or Short Shipped).

The shipment is now successfully fulfilled, and tracking data is synced to the Sales Channel.