How to Manually Set Up Items for a Client [Step-by-Step Guide]
Last updated: October 26, 2026
Items refer to the individual products that will be packed and shipped through techSHIP.
In cases where item details are not imported from your Host System (e.g., your WMS) or a file, you can manually add items to define their properties for cartonization, attach their CUSMA certificates (if applicable), and maintain product identifiers for applicable international shipments.
While manual item creation must be done at the individual Client level, you can manage your entire catalog from a centralized view. For detailed information, refer to 📄 Global Item Maintenance: Managing Items Across Multiple Clients [Guide].
Before proceeding, ensure you are familiar with the prerequisites and available options as detailed in 📄 Understanding Items and Their Role in Cartonization [Information].
To manually set up items for a Client:
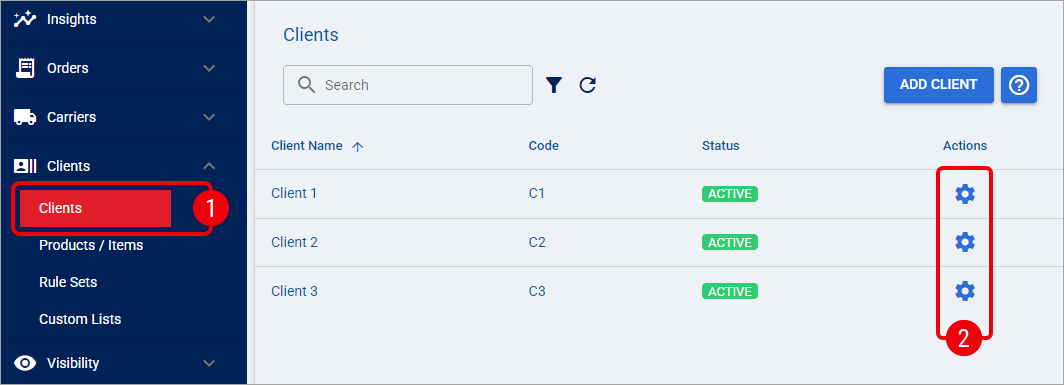
Click on Clients from the left menu under the Clients section to find the desired Client.
Click the Settings icon to edit the desired Client.
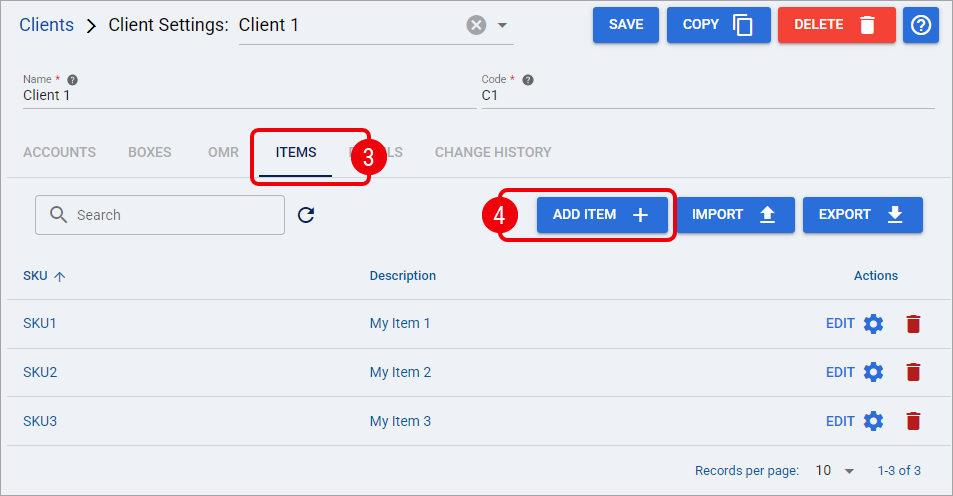
Navigate to the Items tab.
Click Add Item.
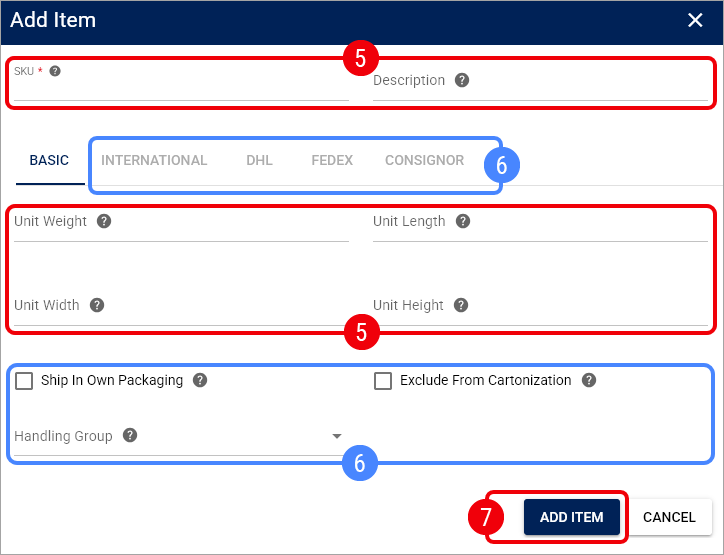
Enter the following fields:
SKU: Stock Keeping Unit.
Description: Item's description. Make sure to enter a brief but accurate description to keep the items table easy to maintain.
Basic fields: Unit Weight, Unit Length, Unit Width, Unit Height.
Optionally, if applicable:
Click the International tab and check Enable International to view the customs and compliance fields:
For a detailed explanation of the fields on this tab, refer to: 📄 Understanding International Item Fields for Customs and Compliance [Information].
To attach a CUSMA certificate, refer to: 📄 How to Attach and Manage a CUSMA Certificate of Origin to an Item [Step-by-Step Guide].
Ship In Own Packaging: Select this option when you need to ship the Item in its own Package. For detailed instructions, refer to 📄 How to Ship Items in Their Own Packaging [Step-by-Step guide].
Handling Group: Select an active Handling Group available for your current Location. Leave the field empty to keep the Item Ungrouped. If the required group is not available, refer to 📄 How to Manage Handling Groups for Cartonization [Step-by-Step Guide].
Selecting Ship In Own Packaging hides Handling Group and Exclude From Cartonization. Selecting Exclude From Cartonization also hides Handling Group. A hidden Handling Group field does not mean that a previously stored assignment has been cleared. For more information, see: 📄 How to Use Cartonization [Guide].
Exclude From Cartonization: Select this option when you need to exclude the Item from Cartonization. To learn more about this field, refer to: 📄 Understanding Items and Their Role in Cartonization [Information].
Complete the carrier-specific Dangerous Goods (DG) fields by clicking on the corresponding tabs.
Click Add Item and go to step 4 as many times as needed.
Saving an Item does not overwrite Manufacturer Product Identifier or UPC values already populated on existing order lines. For details on when catalog values are used to populate order lines, refer to 📄 Understanding EU Product Identifiers in techSHIP [Information].
If you need to correct a specific item, click the edit button (A). If you need to delete an item, click the delete button (B). You can also click the arrow in the table's SKU column header (C) to sort in ascending or descending order.
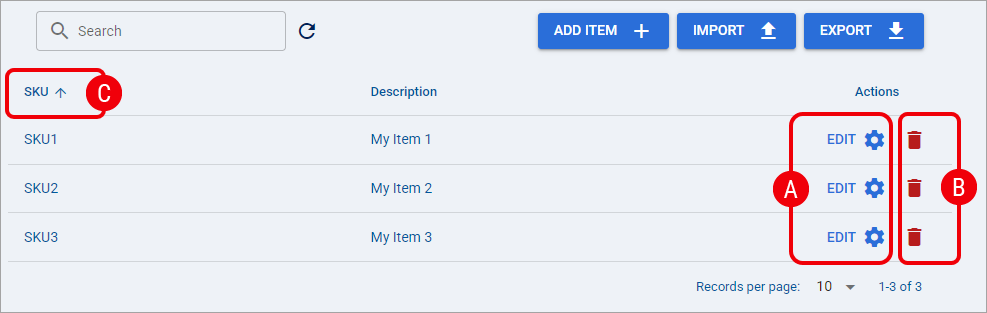
Now items have been manually added and changes are immediately applied.