How to Add a Carrier Baseline Account [Step-by-Step Guide]
Last updated: October 7, 2026
You use a Baseline Account as the fundamental connection point between techSHIP and a Carrier. It serves as a template that holds the credentials and fundamental properties required to process shipments.
This guide covers how you add a new Baseline Account for a specific Carrier and apply the essential configuration required to prepare the connection.
The techSHIP AI Assistant is available from the Carrier page for supported Carrier configuration tasks. For detailed conceptual information and advanced configuration, refer to 📄 techSHIP AI Assistant: Overview & Availability [Information].
Adding the Carrier
Before adding an account, you must ensure the Carrier entity is available for your location.
Click My Carriers from the left menu under the Carriers category.
Click Add Carrier.
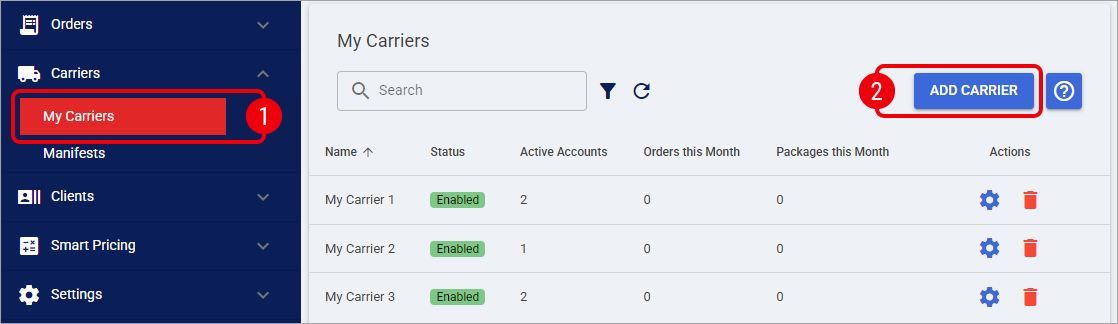
Select the desired Carrier.
You may encounter additional messages depending on the Carrier status or your plan:
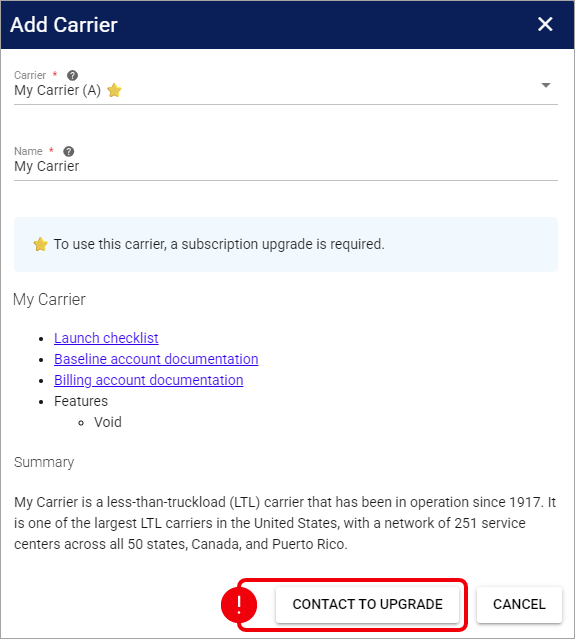
Subscription Required (⭐): If the Carrier has a star icon, you will see a message stating, "To use this carrier, a subscription upgrade is required." Press Contact to Upgrade to proceed.
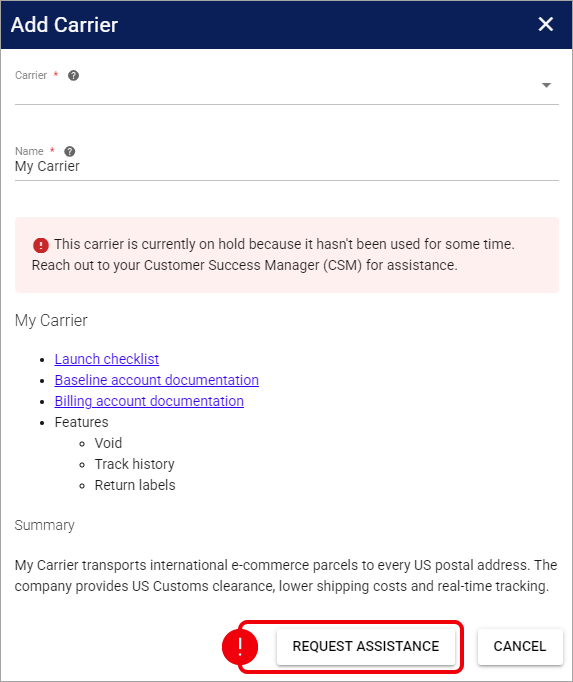
Carrier Suspended: If the Carrier has not been used for an extended period, you will see a message stating, "This carrier is currently on hold..." Press Request Assistance to reactivate it.
Setup Fee Waived: If a Carrier from the same Carrier group is already installed in your location, you can add this Carrier without incurring additional fees.
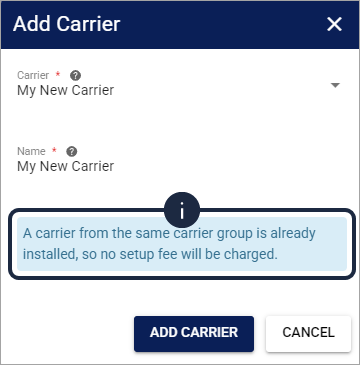
If needed, update the Carrier Name.
Press Add Carrier.
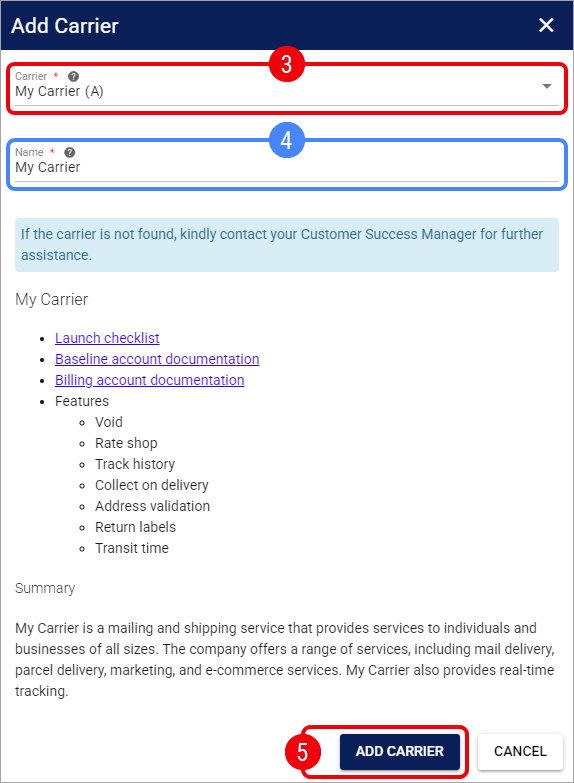
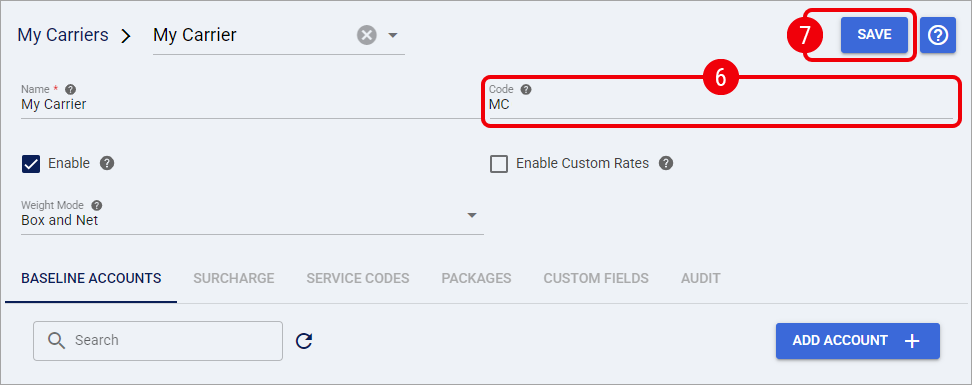
Once the Carrier is added, you are automatically redirected to the Manage Carrier page to continue setting it up.
Enter the Code of the Carrier as it appears in your Host System.
The Carrier Code must match exactly the value defined in your Host System. Any discrepancy, including casing or extra spaces, may prevent the Carrier from working correctly.
Click Save.
If your facility utilizes the centralized Pickup Schedule, we highly recommend adding this new carrier to your calendar now. While not required to process labels, this ensures accurate induction metrics for your Insights dashboards. To learn more, see 📄 Understanding the Centralized Pickup Schedule & Expected Induction Logic [Information].
After you save the Carrier, continue by adding its Baseline Account.
Adding and Configuring the Baseline Account
From the Manage Carrier page, press Add Account to create a new Baseline Account.
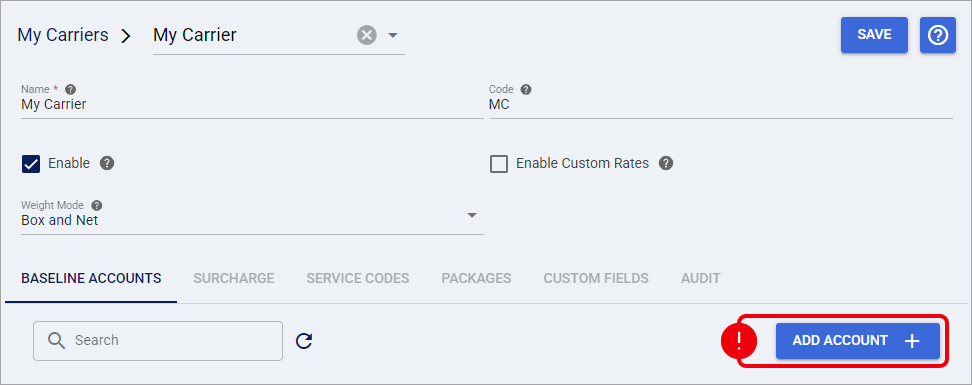
You are redirected to the Manage Baseline Account page to complete the setup.
Essential Configuration
In the General tab, define the administrative properties that are standard across all Carriers:
Name: Enter a descriptive name for the account.
Use a descriptive name based on unique properties, such as Carrier Name - Account Number, Carrier Name - Consolidator Name, or the Carrier Name.
Usage: Select the most suitable option for the account.
Test: Use the account for sandbox or onboarding purposes.
Production: Use the account for live shipping.
Keep the Status field set to its default Active value. A Baseline Account must be Active to remain fully editable. For detailed information about account statuses, refer to 📄 How to Inactivate and Activate a Carrier Baseline Account [Step-by-Step Guide].
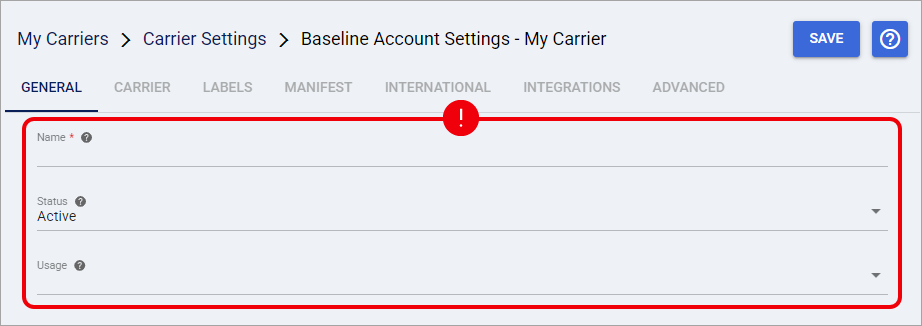
After completing the General tab, continue with the Carrier-specific settings required for the connection.
Carrier-Specific Configuration
To continue, configure the Carrier and Labels tabs. These settings vary by Carrier and must be completed according to the applicable Carrier-specific configuration requirements.
Open the 📄 techSHIP supported Carriers - Master List [Guides List].
Locate your Carrier and open its Baseline Account configuration guide.
Follow the Carrier-specific instructions provided in the guide to configure:
The Carrier tab.
The Labels tab, including the Mode field.
Entering incorrect values in the Carrier tab or selecting an unsupported Label Mode may prevent techSHIP from generating shipping labels.

Some integrations also require registration or authorization after you save the Baseline Account. Complete all required Carrier-specific fields first because the Registration workflow may depend on values configured and saved in the Carrier tab.
After completing the required Carrier and Labels settings, save the Baseline Account to make any applicable registration workflow available.
Finalizing the Setup
Once you have entered the information from the Carrier-specific guide, press Save.

Registering the Account (When Available)
If techSHIP offers the Registration workflow for this integration, saving the Baseline Account makes the Registration tab available. Before the initial save, an eligible account may display the Save to register status.
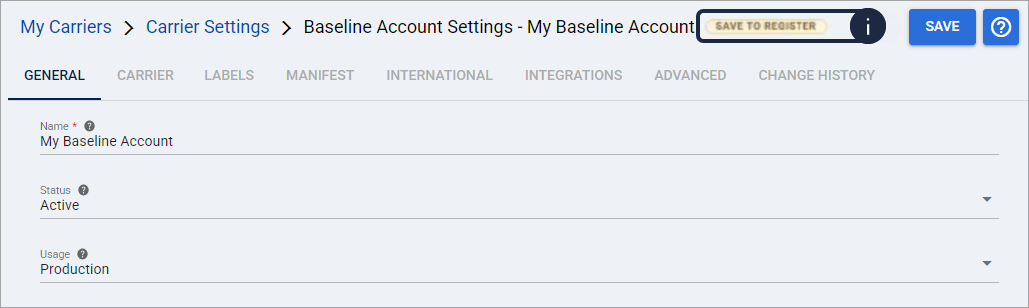
Open the Registration tab and press Registration to continue with the authorization process. Complete any prerequisites requested by the integration and save those values before starting registration.
For the complete procedure, refer to 📄 How to Register a Carrier Baseline Account [Step-by-Step Guide].
Saving the Baseline Account or generating a registration link does not complete authorization. If registration is required, you must complete it before you can create shipments.
If neither the Registration tab nor a registration status badge is available after you save the Baseline Account, the Carrier does not use this Registration workflow in techSHIP.
After completing any required registration, return to the Carrier configuration to continue the setup.
From the Manage Carrier page, you can now see the Baseline Account listed with the administrative status Active.
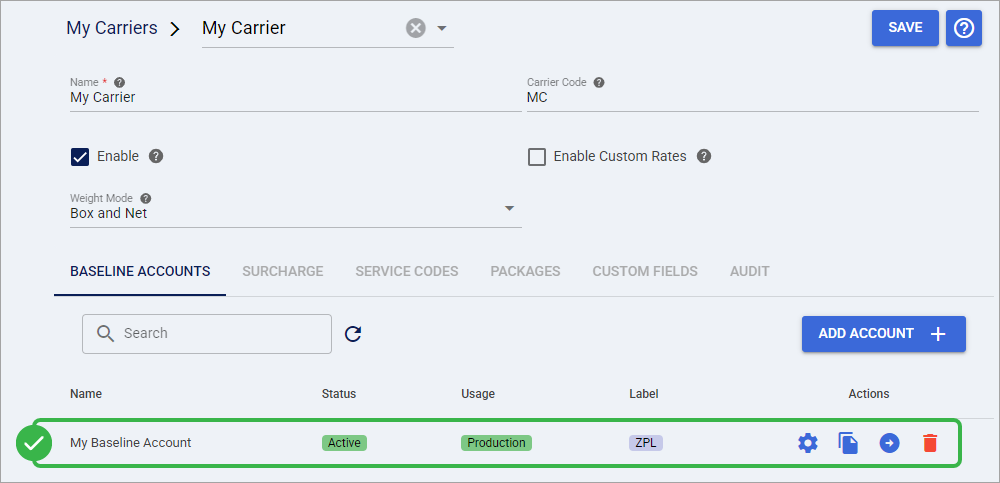
The Baseline Account is now saved and available for further configuration.
The Active status does not by itself confirm that any required Carrier registration or authorization has been completed. Before creating shipments, ensure that any required registration has also been completed
To continue, assign the Baseline Account to a specific Client by creating an Account as detailed in 📄 How to Add a Client (Billing) Account [Step-by-Step guide].