How to View and Edit Order Packages and Item Details [Step-by-Step Guide]
Last updated: October 26, 2026
When managing an order in techSHIP, you can review its packages and update individual item details before processing the shipment. This guide explains how to access the Packages tab, inspect and edit package contents, manage additional product identifiers, and save your changes.
Before You Begin
You can view package and item details when you have access to the order. To edit them, you need an order in an editable status such as Open, Error, or Warning, and the appropriate permissions, as detailed in 📄 techSHIP User Permissions Structure [Information].
If your order is already processed, or you do not have permission to edit it, you can still review its Additional Fields in read-only mode. For details about order states, see 📄 Understanding Order Statuses [Information].
Access the Order's Packages
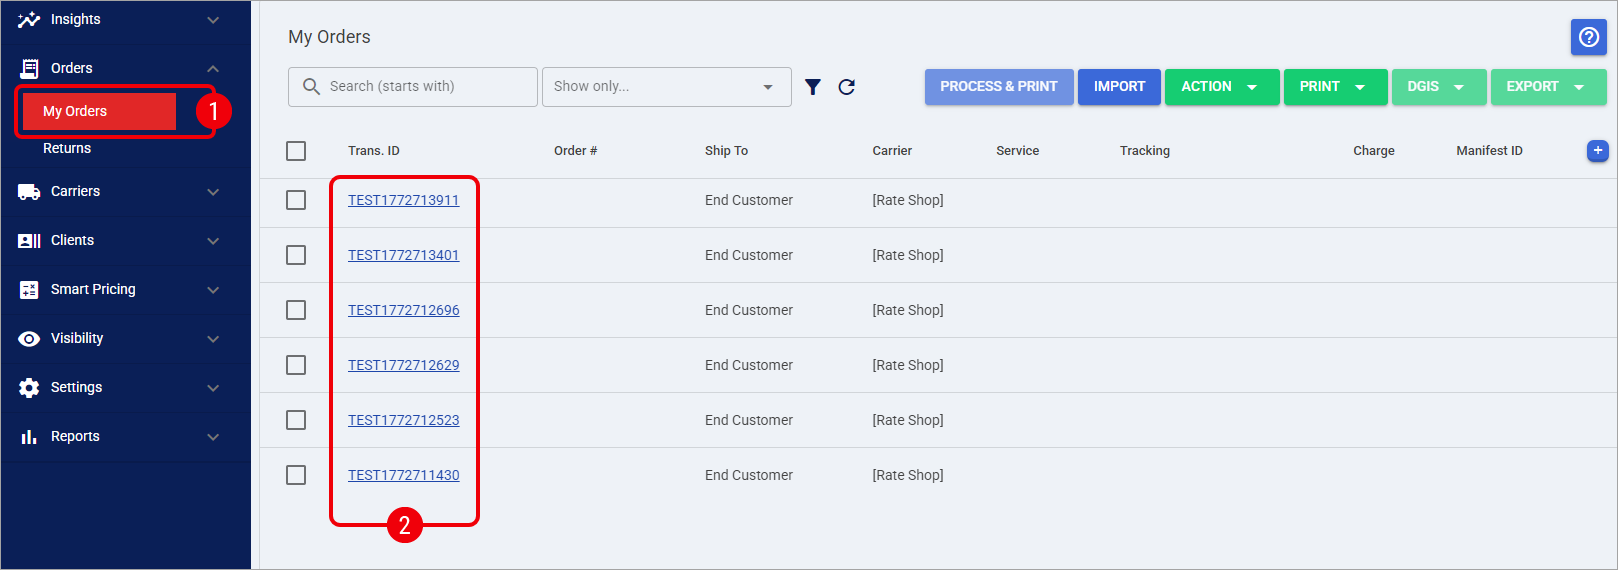
In the left navigation menu, expand Orders and select My Orders.
Locate the order you want to review and open it to access the Edit Order page.
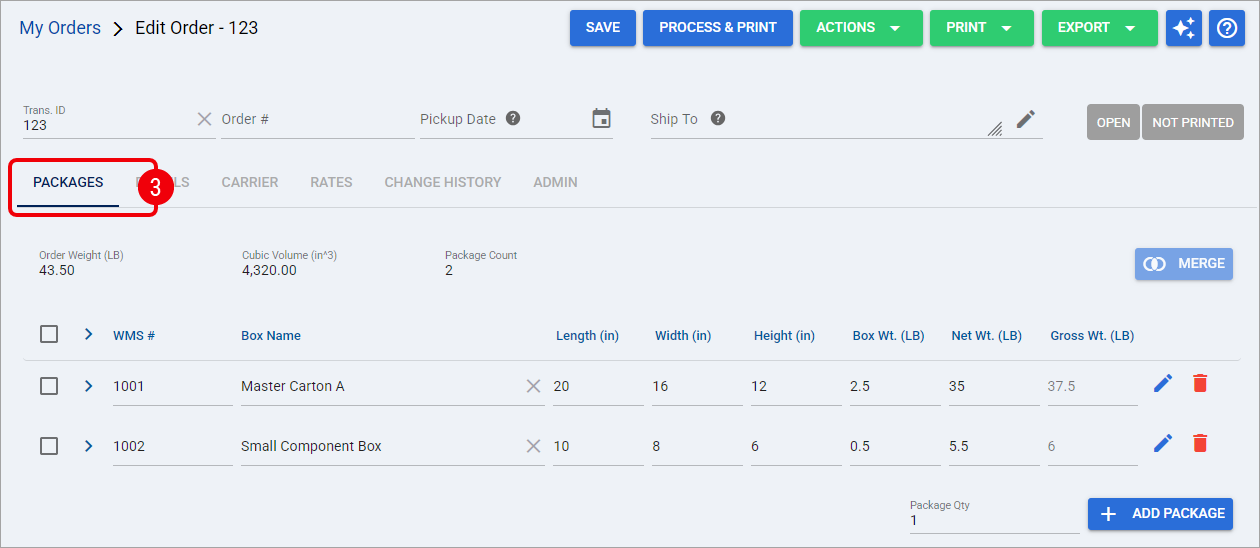
Select the Packages tab.
Here you can review the order summary, including Order Weight, Cubic Volume, and Package Count. Below these values, you can see the available packages and their details.
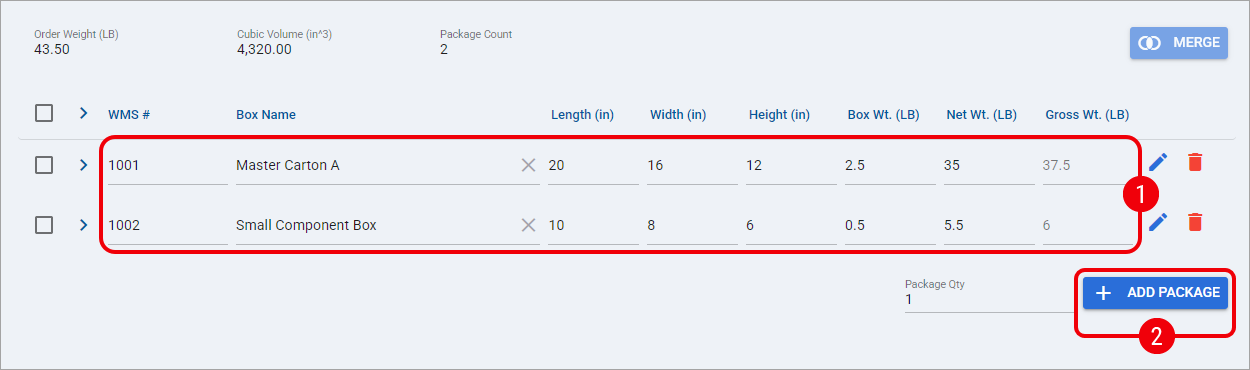
You can now review or update an individual package before expanding it to inspect its items.
Review and Edit Package Details
Each package row contains information about the box used for the shipment.
Review and Update Package Information
Locate the package you want to inspect, review the available fields and:
If the order is editable, update the applicable package fields as needed.
If you need additional packages, enter the desired quantity in Package Qty and click Add Package.
Package weights may change when you modify item quantities, unit weights, or package contents. Automatic synchronization depends on the existing package values and whether a manual weight override has been applied. For field definitions and calculation behavior, see 📄 Package Weight Definitions and Calculation Rules [Information].
Edit Insurance and Dry Ice Weight
You can access additional package-level settings through the Package Details dialog.
Locate the package you want to update and:
Click the Package Details icon beside the package to open its details.
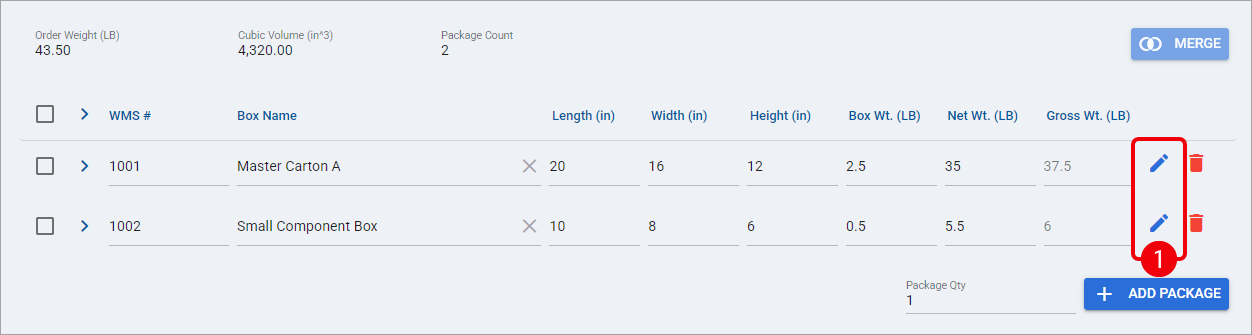
Review or update the following fields as applicable and click Save:
Insurance: Enter the applicable insurance value for the package.
Dry Ice Weight: Enter the weight of the dry ice contained in the package.
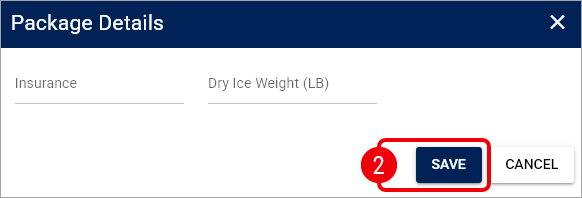
After updating the Package Details, return to the Packages tab to review the package information. Remember to save the overall order when you finish your edits.
Merge Packages
If you need to consolidate multiple packages within the same order, you can use Merge to combine the selected packages.
In the Packages tab, select the checkboxes beside the packages you want to combine.
Click Merge, located in the upper-right area of the package list.
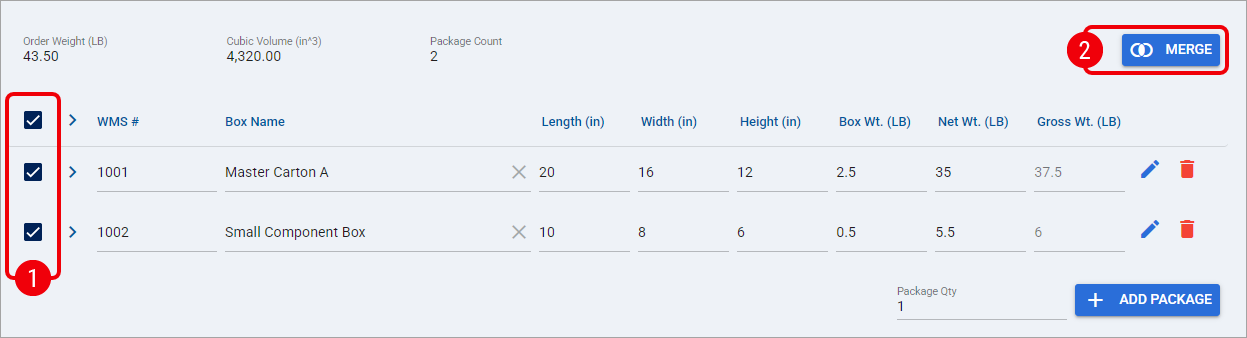
In the Merge confirmation dialog, review the message and click OK to confirm.
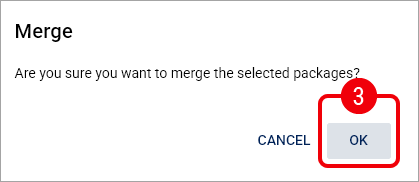
Merging packages changes the order's package structure. Before confirming, ensure that you have selected the correct packages. After merging, review the resulting package contents, dimensions, weights, and any relevant Package Details values to ensure they are correct.
Once you have confirmed the merge and reviewed the resulting packages, you can continue editing their contents or proceed to save the order.
Review and Edit Items Within a Package
Click the expand arrow beside the relevant package row to display its contents.
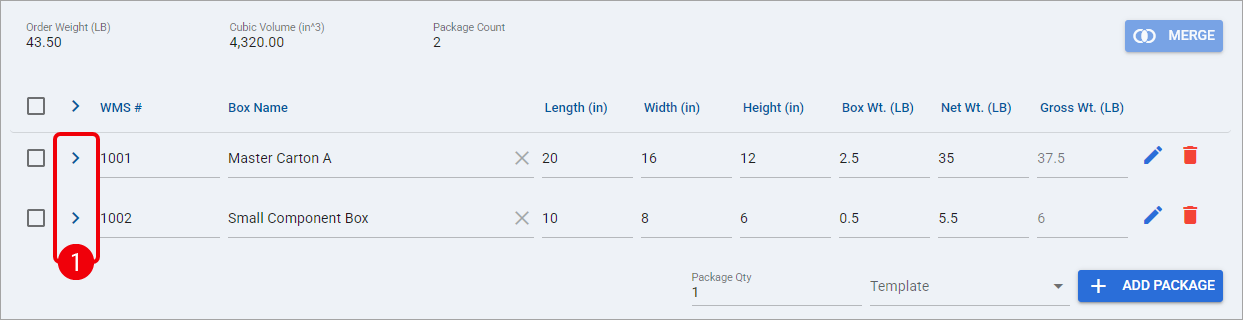
Review each item line, including the available fields:
SKU: The product's Stock Keeping Unit.
Description: The product description.
Quantity: The number of units in the package line.
Country: The product's country of origin, when provided.
Unit Price: The value assigned to each unit.
Unit Wt. and Net Unit Wt.: The available per-unit weight values.
HTS Code: The product's tariff classification code, when applicable.
Handling Group: The group assigned to the item, when applicable. To learn more about this feature, see: 📄 How to Manage Handling Groups for Cartonization [Step-by-Step Guide].
If editing is available, update the necessary line fields directly in the expanded package.
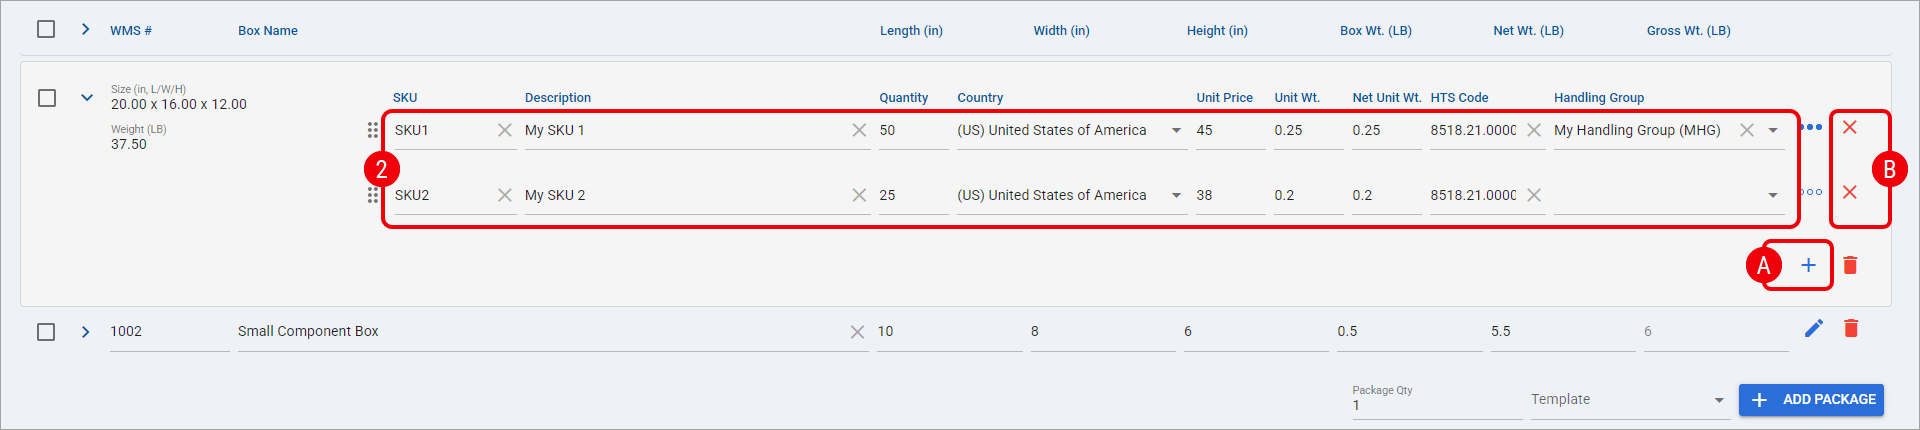
To modify the package contents, use the available add-item (A) or remove-item (B) controls as appropriate.
If you change an item's SKU, review its Manufacturer Product Identifier and UPC before saving. Existing nonempty identifiers are not automatically cleared when you change the SKU, so values associated with the previous product may remain.
After reviewing or editing the item lines, you can open Additional Fields to inspect their product identifiers.
View or Edit Additional Product Identifiers
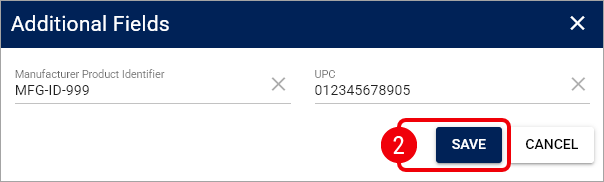
Each item line has an Additional Fields dialog where you can review and, when permitted, modify its Manufacturer Product Identifier and UPC.
In the Packages tab, expand the package containing the item you want to inspect and locate the relevant SKU line. Once there:
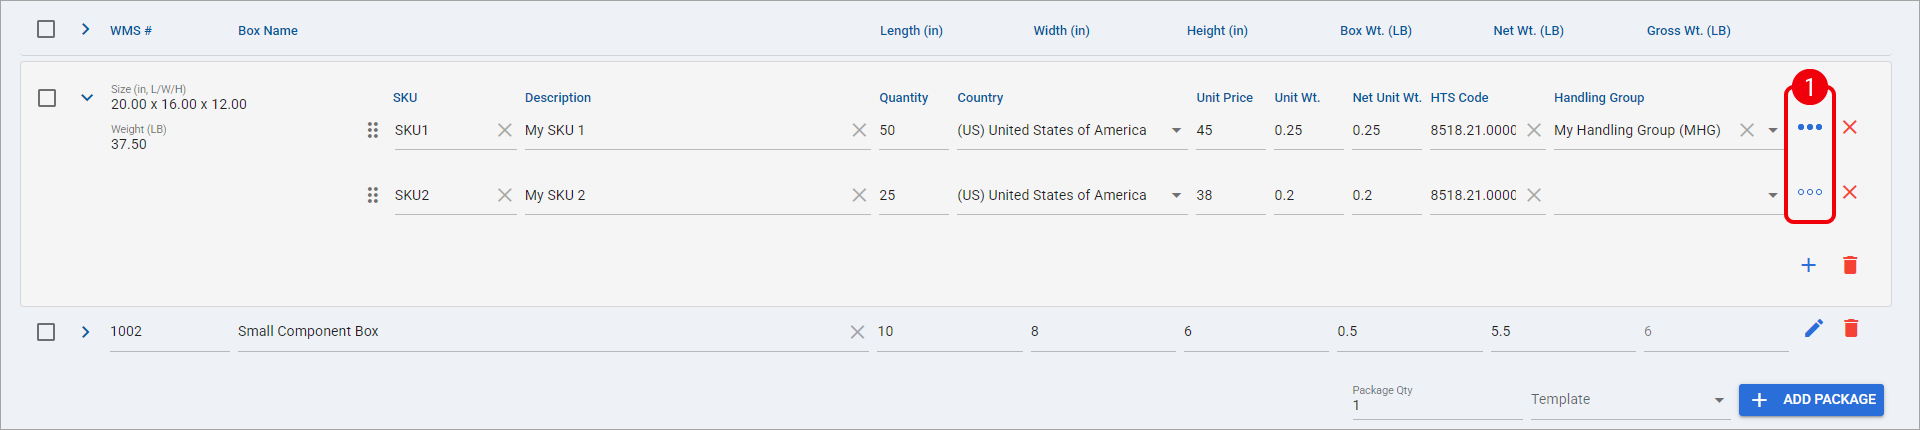
Click the Additional Fields icon near the right end of the line.
Review or modify the properties listed in the Additional Fields dialog and click Save to confirm your changes:
Manufacturer Product Identifier: The manufacturer's product, model, part, or style identifier.
UPC: The field used to store a standardized product identifier, such as a UPC, EAN, GTIN, or ISBN.
The SKU remains visible on the main item line; it is not duplicated in the Additional Fields dialog.
The three-dot button indicates whether additional identifier values are present:
Hollow dots: Both Manufacturer Product Identifier and UPC are empty.
Filled dots: At least one of the two identifier fields contains a value.
This indicator shows data presence only. It does not confirm whether the identifiers are correct, complete, or sufficient for your Carrier's requirements.
Clicking Save in the Additional Fields dialog does not persist the order. You must also click the Save button on the main Edit Order page to store your changes.
Editing an order-line identifier does not update the corresponding item in your Client Item Catalog. Also, clearing an identifier does not necessarily keep it empty: an eligible order may receive that value again from the matching catalog item during processing.
For the full explanation of identifier sources and population behavior, see 📄 Understanding EU Product Identifiers in techSHIP [Information]. If you need to maintain the catalog item itself, see 📄 How to Manually Set Up Items for a Client [Step-by-Step Guide].
Once you have applied the identifier changes, save the overall order to make them persistent.
Save Your Changes
Return to the main Edit Order page after completing your package and item edits and click Save in the upper-right corner to persist the updated order details.

Saved product identifiers are available for a subsequent supported label request. Changing these values does not retroactively modify a label that has already been generated.
Your package and item changes are now saved. If the order is ready for shipment, you can proceed with Process & Print after confirming that its package details and Carrier-required information are complete.